But this is what my town looked like just 4 days ago:

Yes, a snow storm. In fact, two last week. Today, the temperature is just 2 degrees above freezing and the wind is whistling and rattling the windows of this ancient house.
In honor of our obstreperously obstinate winter, here in the frozen north, I'll post one more winter pattern from my vintage collection: from The Art of Knitting, London and New York, 1909.
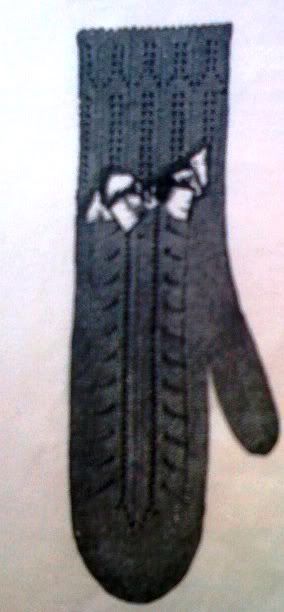
These mittens were originally knit using thread-weight purse silk twist and tiny steel needles (size 00000 US or vintage UK size 19) - size 19 UK.
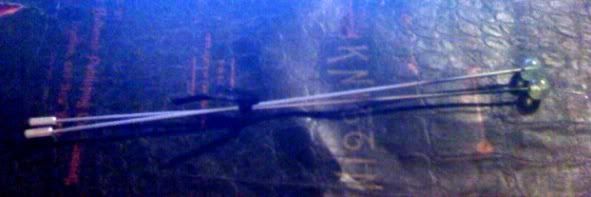
I have a pair of these needles that I got at a yarn fair from Twisted Sistah Beads. Of course, this pattern requires DPNs, not straights.
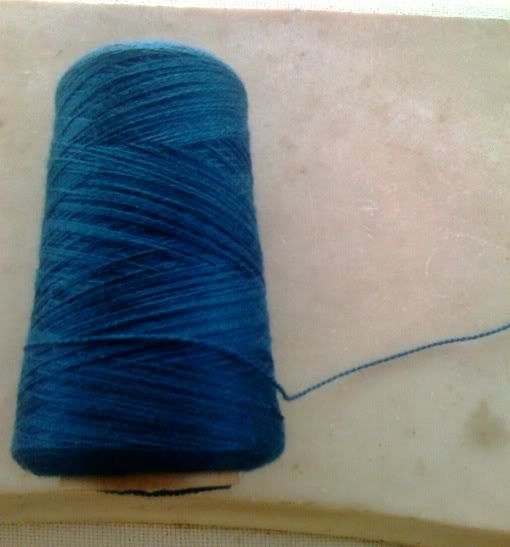
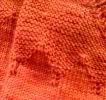
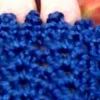
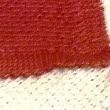
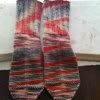
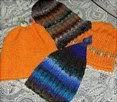
I plan to knit these mittens using a yarn slightly weightier than thread - either the lace-weight Tencel (a natural plant fiber with a silk-like sheen and drape) in this beautiful blue that I got on a cone at Webs in the back warehouse,
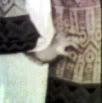
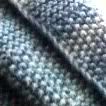
or this divine Hand Maiden Flaxen, a blend of silk and linen in the colour Smoke,
which I got at Knit/Purl in Portland, while in my other home:

The original stitch count for casting on is 80, because of the tiny gauge. I recommend casting on 60 sts for a small hand, and using light fingering weight (such as the yarns above) use a size US 1 set of DPNs. Use a stretchy cast on such as the long-tail. Two of the needles should have equal numbers of sts on them, and the 3rd should have a few more stitches than the others (60 = 16/16/28). Join - mark the beginning of the row (in my experience the tail of cast on may not be a visually specific enough marker) and knit 5 rows.
R 6 - K2tog, YO all around
R 7 - 13 - knit
R 14 - K1, YO, K2, sl 1, K2tog, PSSO, K2, YO, repeat around
R 15 - knit
Repeat the last 2 rounds 3 times each:
R 16 = R 14
R 17 = R15
R 18 = R14
R 19 = R15
R 20 = R14
R 21 = R15 and after each of Rows 17, 19, and 21 pass the first stitch of each needle onto the next needle, knitting the first one slipped only as the last stitch of the knit round.
R 22 - 26 - knit
R 27 - 50 - repeat rows 14 and 15, slipping the stitches in the knit rounds as directed above.
R 51 - knit
This completes the fancy cuff section of the mitten. Now comes the lace section of the wrist. To make this lace panel come in the right place, redistribute the stitches so that the third needle contains 31 stitches and the rest of the stitches are divided between the other two needles (14 on one and fifteen on the other. The lace panel is knit over 29 stitches in 8 rounds, repeated the number of times to get the length you require, minus the the length of the tip of the mitten (1.5 inches). For a small hand, the number of repeats of these 8 lace rows might be 10.
Needle 3 now becomes your first needle, and is the needle on which the lace panel is completed. The stitches on the remaining 2 needles are always knit. On row 76, or after three repeats of the 8-round lace pattern, the thumb increases begin on one side.
Lace pattern:
NOTE: the original directions say: Slip and Bind which means: "slip one stitch, knit the next; pass the slipped stitch over the knit stitch" so on future rows where this term is used, I'll use SKP.
R 52 - K1, SKP, K6, YO, K2, YO, K3, sl 1, K2tog, PSSO, K3, YO, K2, YO, K6, K2tog, Knit the remaining st in the round
R 53 - K1, SKP, K5, YO, K15, YO, K5, K2tog, Knit remaining
R 54 - K1, SKP, K4, YO, K4, YO, K3, sl 1, K2tog, PSSO, K3, YO, K4, YO, K4, K2tog, Knit remaining
R 55 - K1, SKP, K3, YO, K19, YO, K3, K2tog, Knit remaining
R 56 - K1, SKP, K2, YO, K6, YO, K3, sl 1, K2tog, PSSO, K3, YO, K6, YO, K2, K2tog, knit remaining
R 57 - K1, SKP, YO, K8, YO, K3, sl 1, K2tog, PSSO, K5,3YO, K8, Yo, K2tog, knit remaining
R 58 - Knit ll stitches
Knit these 8 rows twice more and then begin the thumb increases as follows:
The Thumb:
On a right hand mitten the thumb must be at the left of the lace panel, while on the left hand mitten it must be placed at the right of the lace panel.
Starting with Row 76, knit the first row of the lace panel, k1. This should bring you to the end of the first needle. On the next needle, K 1, then Knit front and back (Kfb)of the next stitch. Knit 2, Kfb, knit remaining. Repeat Row 76 directions every other row (the number of stitches between increases with be greater by two each time) until you have 12 increases or 24 rows. Place the thumb stitches on a stitch holder on the next round and cast on 4 stitches over the back side of the thumb opening on the following round. In the four rounds that follow, decrease one stitch in each round at the point where the extra stitches were cast on, thus disposing of the four extra stitches and forming one-half of a small diamond-shaped gusset, the other half being formed in the same manner when work on the thumb is resumed.
At the same time, you will be continuing with the rows o the lace panel on the first needle. After you've finished the lace panel of the hand portion to about 1.5 inches from the fingertips, the fancy tip of the panel is knit in 6 rounds as follows:
Round 1 - K9, K2tog, YO, K1, YO, K2, sl1, K2tog, PSSO, K2, YO, K1, YO, SKP, knit remaining stitches
Round 2 - Knit all sts around
Round 3 - K13, YO, K1, sl 1, K2tog, PSSO, K1, YO, knit remaining
Round 4 - Knit all
Round 5 - K14, YO, sl 1, K2tog, PSSO, YO, knit remaining
Round 6 - Knit all
On the next round, begin the decreases for the top of the mitten. K8, K2tog around.
On next round, knit plain.
Continuing these two rows, decreasing above the previous decreases until you have 4 stitches remaining. Fasten off, thread tail through remaining stitches and close.
Resuming the Thumb:
Place the stitches that are on the thumb stitch holder evenly on three DPNs and pick up 4 stitches from the base of the gore that was formed by casting on 4 stitches between the the thumb and the hand. Knit once around, and then decrease one stitch in each of the next four rounds at the point where the gusset is. Then knit as many rounds as needed to give the proper length to the thumb, and finish by K2tog in each needle each round until 3 sts are left. Fasten off, thread tail through the 3 sts and close.
On the cuff, fold the edge over to the inside on the YO eyelet row, and loosely sew using over-stitch to inside of cuff, forming neat picot edging. Male sure that this edge in still stretchy enough to go over the hand.
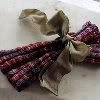
Form bow with wide silk ribbon and tack to the back of mitten where the lace panel begins.
Weave in ends and block mittens.


1 comment:
Those mittens are really lovely. I hope spring will come to you, as well.
Post a Comment