Wednesday, January 2, 2013
Saturday, September 1, 2012
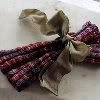
The Swish of Vintage Silk
A most wonderful swap box arrived at my house this week:
(well, two wonderful swap boxes arrived, but I'm going tell you about this one in particular).
See that long flat package? I happened to open that last and do you know what it was? This!
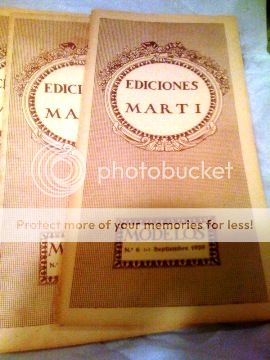
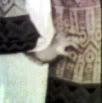
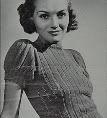
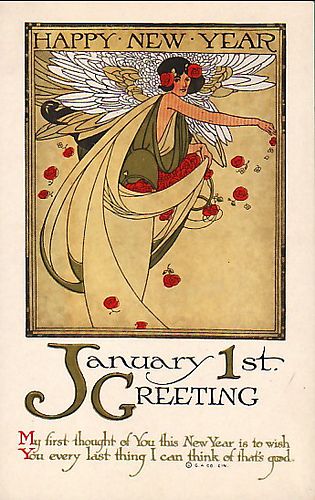
Three 1929 fashion sewing booklets full of gorgeous pen-and-ink dress drawings ...... with the PATTERNS!!

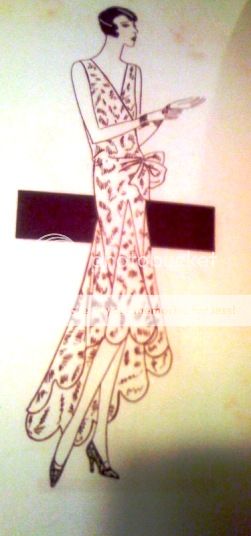
My friend who sent the box - a most amazing designer and yarnie from NYC - was online while I opened it, and she told me that friends of hers brought these booklets back several years ago from a trip to Spain. They are of course in Spanish, but the language of vintage fashion is universal isn't it? I love them immoderately and think she was so, so generous to pass them on to me! Here are a few gorgeous pictures for you to enjoy:

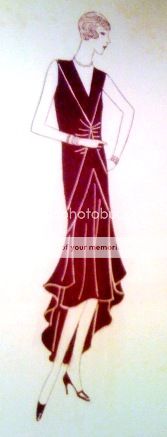
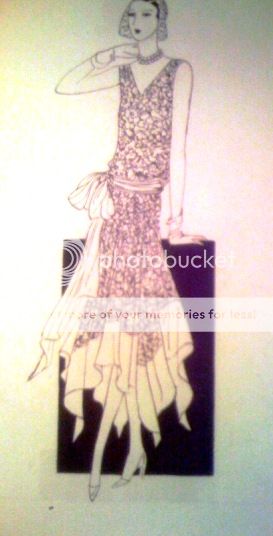
I do plan to make some of these and the one I'm going to make first is this (I'm thinking grey mauve silk satin and/or midnight blue):

My last adventure into 1930's fashion sewing was HERE...
(well, two wonderful swap boxes arrived, but I'm going tell you about this one in particular).
See that long flat package? I happened to open that last and do you know what it was? This!
Three 1929 fashion sewing booklets full of gorgeous pen-and-ink dress drawings ...... with the PATTERNS!!
My friend who sent the box - a most amazing designer and yarnie from NYC - was online while I opened it, and she told me that friends of hers brought these booklets back several years ago from a trip to Spain. They are of course in Spanish, but the language of vintage fashion is universal isn't it? I love them immoderately and think she was so, so generous to pass them on to me! Here are a few gorgeous pictures for you to enjoy:
I do plan to make some of these and the one I'm going to make first is this (I'm thinking grey mauve silk satin and/or midnight blue):
My last adventure into 1930's fashion sewing was HERE...
Saturday, August 25, 2012
The Nile - a bit of a review
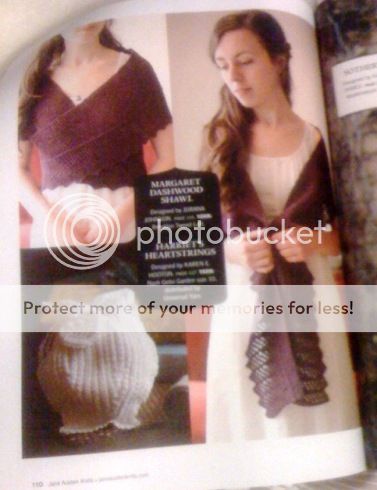
I've been knitting for some time on one of the patterns from this year's Jane Austin Knits from Interweave... you can see how I love these editions by how well-thumbed my magazine is. There are usually several patterns I want to make and I find them very satisfying for my vintage-loving heart. My well-worn mag:

One of my local yarn shops has been holding a Jane Austin Knit Night throughout the summer and each person is knitting a pattern from either the first or second Jane Austin magazine, or the newer Jane Austin crochet book, Austentatious Crochet.
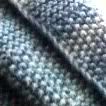
The pattern I chose is Margaret Dashwood's Shawl by Joanna Johnson. As you can see from the pictures, it is a repetitive and soothing knit - just what I was longing for! This shawl is a brilliant wisp of simple garter stitch and lace knitting with true vintage construction, style, and appearance. I love it beyond reason and want to make more, experimenting with different yarn weights and needle sizes.
This first one I'm making, which I've named The Nile for various reasons, is out of Frog Tree's Alpaca Sport Melange - a heathery green that looks not only like weeds along the river but like a real hand spun vintage yarn. My shawl will look like it came from Margaret Dashwood's shoulders just yesterday!
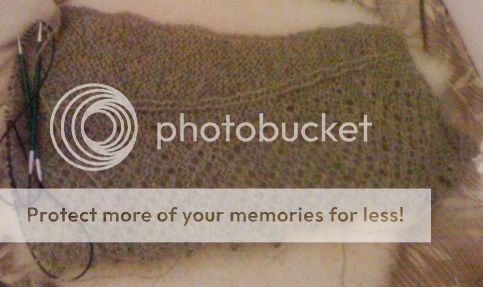
If you plan to knit this, please keep in mind that the pattern was designed for a pre-teen or young girl. If you are making it for an adult, you'll want to add yarn and pattern repeats - keeping track of your mid-point, so your decrease side will be symmetrical. I added one ball, or 215 yards, to mine.
Margaret has always been one of my favourite characters in Jane Austin's Sense and Sensibility. I like her complete innocence and abandon - the way she relates to her two older sisters: who at times seem as close as twins. It obvious that she is much loved - and I love her keen interest in the world around around her. One of the most delightful scenes in the movie that stars Emilie Francois as Margaret, is when she is hiding under the library table and her sister Eleanor and visitor Edward begin to sprout outrageous facts about the source of the Nile River - causing her to pop out from under the table to correct them!
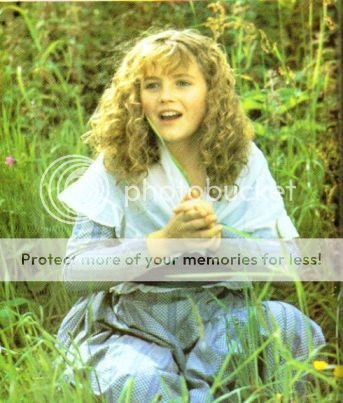
My day is long today, full of tasks left undone from my last two weeks of surgery and recovery, so there's no movie-watching planned - tasks like laundry, lawn mowing, and groceries that really eat up the weekend hours. But soon. Soon in one of these days coming up I'll rewatch Sense and Sensibility as I knit my Nile-coloured Margaret Dashwood shawl.
One of my local yarn shops has been holding a Jane Austin Knit Night throughout the summer and each person is knitting a pattern from either the first or second Jane Austin magazine, or the newer Jane Austin crochet book, Austentatious Crochet.
The pattern I chose is Margaret Dashwood's Shawl by Joanna Johnson. As you can see from the pictures, it is a repetitive and soothing knit - just what I was longing for! This shawl is a brilliant wisp of simple garter stitch and lace knitting with true vintage construction, style, and appearance. I love it beyond reason and want to make more, experimenting with different yarn weights and needle sizes.
This first one I'm making, which I've named The Nile for various reasons, is out of Frog Tree's Alpaca Sport Melange - a heathery green that looks not only like weeds along the river but like a real hand spun vintage yarn. My shawl will look like it came from Margaret Dashwood's shoulders just yesterday!
If you plan to knit this, please keep in mind that the pattern was designed for a pre-teen or young girl. If you are making it for an adult, you'll want to add yarn and pattern repeats - keeping track of your mid-point, so your decrease side will be symmetrical. I added one ball, or 215 yards, to mine.
Margaret has always been one of my favourite characters in Jane Austin's Sense and Sensibility. I like her complete innocence and abandon - the way she relates to her two older sisters: who at times seem as close as twins. It obvious that she is much loved - and I love her keen interest in the world around around her. One of the most delightful scenes in the movie that stars Emilie Francois as Margaret, is when she is hiding under the library table and her sister Eleanor and visitor Edward begin to sprout outrageous facts about the source of the Nile River - causing her to pop out from under the table to correct them!
My day is long today, full of tasks left undone from my last two weeks of surgery and recovery, so there's no movie-watching planned - tasks like laundry, lawn mowing, and groceries that really eat up the weekend hours. But soon. Soon in one of these days coming up I'll rewatch Sense and Sensibility as I knit my Nile-coloured Margaret Dashwood shawl.
Sunday, June 24, 2012
Miss Marple and Me
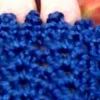
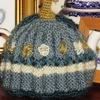
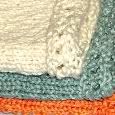
I've always thought that if I ever become an old woman, I'll be just like Miss Marple. Maybe that's wishful thinking, but I'm preparing for that by knitting things that Miss Marple might knit. In one of her mysteries, she is described as knitting on a shawl (this is what baby blankets were called in her era), pink and fluffy. Well, my shawl isn't pink or fluffy and its not a baby blanket, but it is Miss Marple's Shawl from the great historical knitting edition of Piecework Magazine of last year.

It has only taken me a year to complete this project! I began on July 23, 2011 and finished on June 23 of 2012.It is 65 inches square.
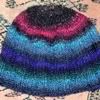
I used Blue Moon Fiber Arts Marine Silk lightweight in the Lodestone colourway, a delicate pale green like spring leaves. In some of my photos it looks olive green, but that is - I think - because I have those old style lightbulbs that give everything a yellowish cast. This yarn is beautiful to work with and I think I'm going to make a delicate vintage blouse with my leftover skein. Miss Marple's Shawl took a little over 3 skeins on size 5 needles.
This picture is more accurate for colour:
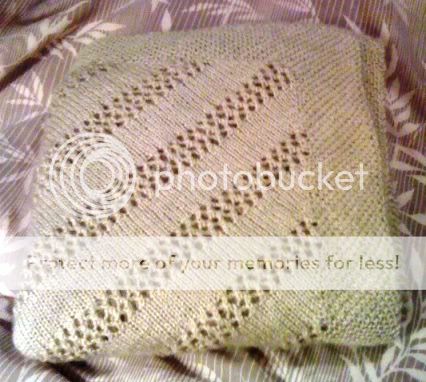
I had to write out the pattern line by line in a multi-page table to keep track of the hundreds of rows. It was good though - no mistakes and no back-tracking! I just checked off the repeat sections as I completed them and carried on.
I love that I can use it on the bed as a lightweight blanket, or fold it in half and throw it around my shoulders for a triangle shawl when I'm reading in bed. I may never do another full size blanket in lightweight-almost-laceweight yarn again, but I'll treasure my Miss Marple's Shawl until I become Miss Marple myself.
It has only taken me a year to complete this project! I began on July 23, 2011 and finished on June 23 of 2012.It is 65 inches square.
I used Blue Moon Fiber Arts Marine Silk lightweight in the Lodestone colourway, a delicate pale green like spring leaves. In some of my photos it looks olive green, but that is - I think - because I have those old style lightbulbs that give everything a yellowish cast. This yarn is beautiful to work with and I think I'm going to make a delicate vintage blouse with my leftover skein. Miss Marple's Shawl took a little over 3 skeins on size 5 needles.
This picture is more accurate for colour:
I had to write out the pattern line by line in a multi-page table to keep track of the hundreds of rows. It was good though - no mistakes and no back-tracking! I just checked off the repeat sections as I completed them and carried on.
I love that I can use it on the bed as a lightweight blanket, or fold it in half and throw it around my shoulders for a triangle shawl when I'm reading in bed. I may never do another full size blanket in lightweight-almost-laceweight yarn again, but I'll treasure my Miss Marple's Shawl until I become Miss Marple myself.
Monday, June 18, 2012
Herb Gathering
From THIS:
to THIS:
in 20 days!
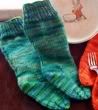
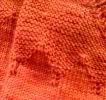
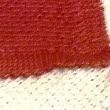
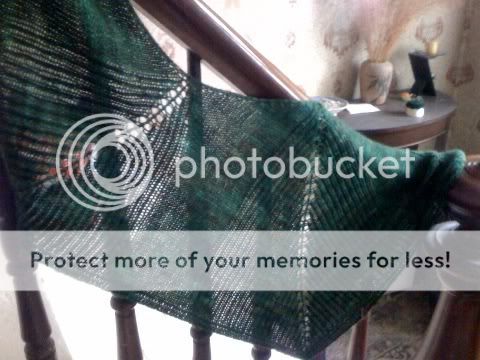
This is my Herbivore for Camp Loopy Project One. I used just over one skein of yarn - Alisha Goes Around, Panoply of Peacocks in the colourway Deciduous - to meet the 400 yard requirements for the challenge. If not for this yardage requirement for Camp Loopy's first project, I would have stopped when the first skein ran out. At 360 yards of soft, cushy cashmere and merino blend it was the perfect size for a shawlette/scarf. With the extra 55 yards I put into it, its a full sized shawl.
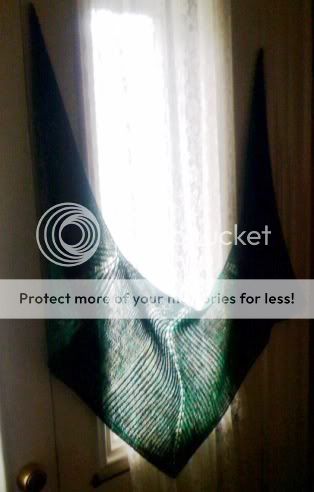
I do love it this big and I'm sure that the person I made this for will love it as it is.
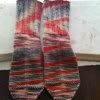
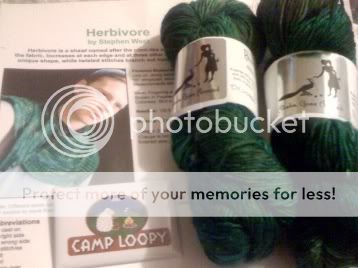
My next challenge - Camp Loopy Project Two - requires 800 yards of yarn. I have chosen Secret of Change in Madeline Tosh Merino Light, Lowland:
I'm looking forward to another satisfying knitting experience.
to THIS:
in 20 days!
This is my Herbivore for Camp Loopy Project One. I used just over one skein of yarn - Alisha Goes Around, Panoply of Peacocks in the colourway Deciduous - to meet the 400 yard requirements for the challenge. If not for this yardage requirement for Camp Loopy's first project, I would have stopped when the first skein ran out. At 360 yards of soft, cushy cashmere and merino blend it was the perfect size for a shawlette/scarf. With the extra 55 yards I put into it, its a full sized shawl.
I do love it this big and I'm sure that the person I made this for will love it as it is.
My next challenge - Camp Loopy Project Two - requires 800 yards of yarn. I have chosen Secret of Change in Madeline Tosh Merino Light, Lowland:
I'm looking forward to another satisfying knitting experience.
Sunday, June 10, 2012
Eclectic
I have a bit of an eclectic post this weekend, as life has been decidedly... crazy! The boyfriend and I visited his folks again for a combined Mother's Day and Father's Day, and this involved a trip to another fabulous Cape Cod restaurant. Unfortunately, I've completely forgotten the name already! It was kind of a whirlwind drive down and back...
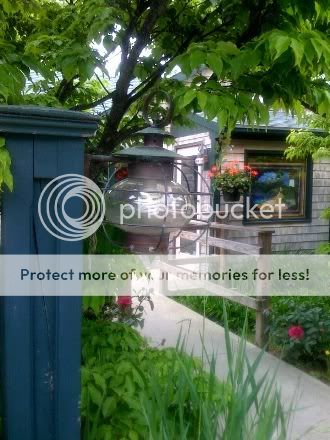
I love the thought of living on the ocean all year long, in a little grey-shingled cottage with green vines around the entryway... sheep in the backyard, walks on the beach across the street, salt roses lining the flagstone walk.... that's really how they live!
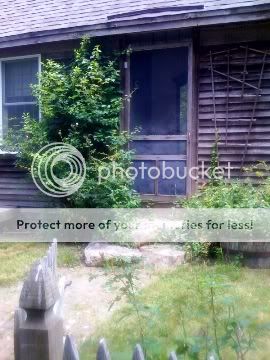
The restaurant had a beautiful entryway too, with stained glass windows:
and inside, artist's renditions of the local waterways covered the walls:
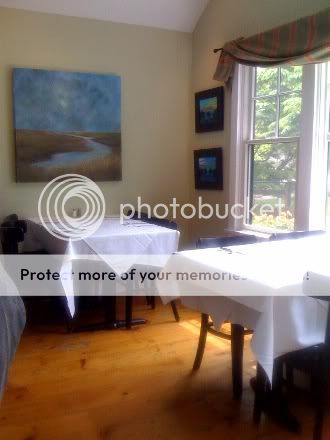
I think we all ordered their special lobster roll, which was served hot, tossed in melted butter on a croissant that had been sliced and grilled with butter on the inside. Calories to spare! For dessert we all shared one piece of 3-layer Limoncello cake.
My week was also full of arrivals. I got my Ravelry Celebration Contest Winner bags, my shirt, cup, and cards of the Bird-Pulling-Yarn design, and a bag of the hilarious Party Animals!
The last thing I want to share is that a new edition of Interweave's specialty magazine Knit Wear is coming out shortly and I wanted to do a little review so folks didn't miss it. The premiere edition was so stunning to me that I want to share the love!
This magazine is described on the cover as "simple handknits for the thoughtful knitter" and by this, they don't mean simple to knit. But the lines and styles have that simple elegance:

The blue sweater above is knit with Quince Yarns Osprey chunky weight yarn so it would knit up fairly quickly, which is a plus.
This magazine was planned by Editor Eunny Jang, and she describes it as being all about authentic luxury - which to me means clean lines, good-quality yarns, and classic long-lasting style. I'm eagerly awaiting the arrival of the newest edition and I need to start planning some actual projects!
And on a last note, my Camp Loopy Herbivore is coming along and I'm just about to join the second skein. The pattern doesn't call for 400 yards, that's one of the requirements of Camp Loopy's first project, but it does make it more shawl-less scarf and that works for me!
I love the thought of living on the ocean all year long, in a little grey-shingled cottage with green vines around the entryway... sheep in the backyard, walks on the beach across the street, salt roses lining the flagstone walk.... that's really how they live!
The restaurant had a beautiful entryway too, with stained glass windows:
and inside, artist's renditions of the local waterways covered the walls:
I think we all ordered their special lobster roll, which was served hot, tossed in melted butter on a croissant that had been sliced and grilled with butter on the inside. Calories to spare! For dessert we all shared one piece of 3-layer Limoncello cake.
My week was also full of arrivals. I got my Ravelry Celebration Contest Winner bags, my shirt, cup, and cards of the Bird-Pulling-Yarn design, and a bag of the hilarious Party Animals!
The last thing I want to share is that a new edition of Interweave's specialty magazine Knit Wear is coming out shortly and I wanted to do a little review so folks didn't miss it. The premiere edition was so stunning to me that I want to share the love!
This magazine is described on the cover as "simple handknits for the thoughtful knitter" and by this, they don't mean simple to knit. But the lines and styles have that simple elegance:
The blue sweater above is knit with Quince Yarns Osprey chunky weight yarn so it would knit up fairly quickly, which is a plus.
This magazine was planned by Editor Eunny Jang, and she describes it as being all about authentic luxury - which to me means clean lines, good-quality yarns, and classic long-lasting style. I'm eagerly awaiting the arrival of the newest edition and I need to start planning some actual projects!
And on a last note, my Camp Loopy Herbivore is coming along and I'm just about to join the second skein. The pattern doesn't call for 400 yards, that's one of the requirements of Camp Loopy's first project, but it does make it more shawl-less scarf and that works for me!
Sunday, June 3, 2012
Paddle Your Own Canoe
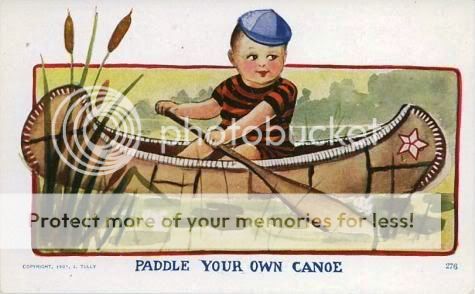
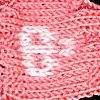
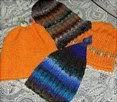
Camp Loopy 2012 is underway and I'm in the Green Canoe! Each participant is divided up into groups based on the colour of their project yarn and the groups are different coloured canoes.There is a Green canoe, and Blue, Yellow-Orange, Purple-Red, and Brown-Black canoes, and a "Crazy Canoe" for those using very variegated yarn or colours that don't fit into the other canoes.
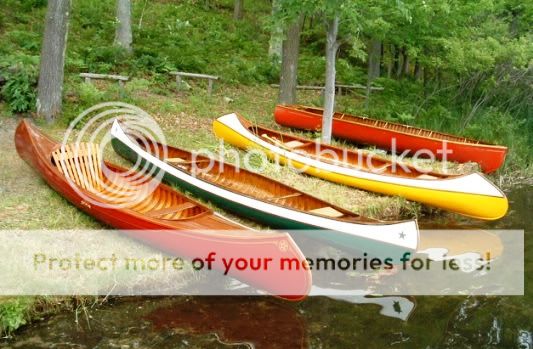
Mine is decidedly Green - no question about that!
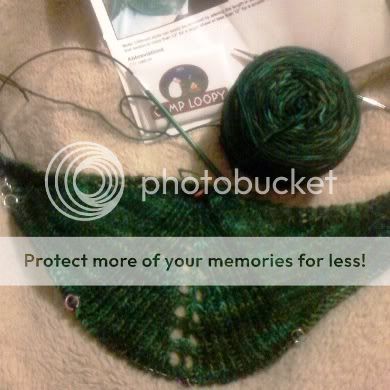
I'm knitting Stephen West's Herbivore shawl using a yarn new to me: Alisha Goes Around. The yarn is a Merino/Cashmere blend - very soft and deeply saturated. The colour is Deciduous.
The challenge of this first-of-three months' Camp Project is to use a pattern by a designer who lives in or is from a country other than your own. There are so many to choose from that the challenge for me was not to find a pattern I wanted to make, but to choose among the Many I wanted to make!
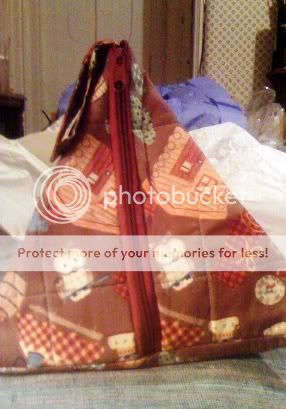
I also have an adorable project bag made for me last year specifically for Camp Loopy by my friend Nad:
I'm making good progress after only a week and the pattern looks beautiful:
I'm hoping for a long, lazy afternoon today so I can paddle my canoe down the green river for a few miles!
Subscribe to:
Posts (Atom)