Showing posts with label free patterns. Show all posts

Sunday, March 11, 2012

Crazy Stitch Crazy Love

Photobucket

In many of my oldest needlework manuals, there are several pages of stitch patterns. Over the years, I've noticed an interesting phenomenon. In the earliest booklets - say 1800's through 1905 or so, is crochet stitch called Crazy Stitch but in later years it dies out, never mentioned again.

Photobucket

I find this particularly true of crochet. The stitches wan and wax in popularity and go in and out of fashion. As I've collected books and booklets that span the decades from 1800 through today, I've seen this happen and beautiful stitch patterns that were common 100 years ago are practically non-existent now. I did find one example of the crazy stitch being used about 10 years ago. A blanket posted on the internet as "diagonal crochet" used this stitch, but didn't identify it. Recently, a friend showed me a baby blanket she had made, and I recognized this stitch so it must be around.

As you've gathered by now, I've used this stitch a lot - I've made blankets, scarves, and triangular shawls with it - and each item has an elegant and complex look.

Photobucket

I use the directions from the 1904 Utopia Yarn Book

Photobucket

Make a chain of the desired length.
Row 1 - Make 3 dc in 3 chain; skip 2 chain and fasten with 1 sc. *chain 3; make 3 dc in the same st with the sc; skip 2 ch and fasten with 1 sc. Repeat from * to end of row.
Row 2 - Chain 3, make 3 dc in the last sc made in the first row; fasten with 1 sc in the loop formed by the chain of 3 in the preceding row; ch 3, make 3 dc in the same loop where the sc was just made and fasten as before with 1 sc. Repeat across row.

I used this stitch in my soft merino scarf, pictured:

Photobucket

This scarf is 9 pattern repeats across and 48 2-row repeats long. I used Perle Cotton in two colours for the fringe, knotting it for the lacy look. The yarn is 100% merino sport weight, in a discontinued brand, but any soft yarn of any weight would work well.

I love this scarf because it looks like a vintage artifact, even though it's new. And it looks perfect with my camel-hair winter coat! And that's why stitch patterns should never be forgotten - they are timeless, really.

It National Crochet Month (or International Crochet Month, perhaps?) so I've been featuring crochet, but I've discovered some gorgeous Spring sweaters in my Columbia books from the 1930's and I don't think I can wait until April to show them to you!

Friday, March 2, 2012

Art Deco all around

Photobucket

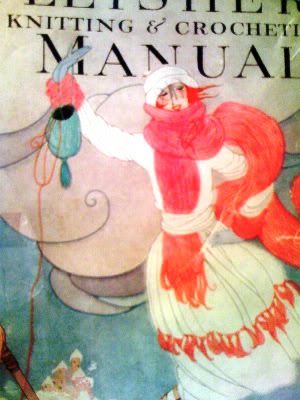
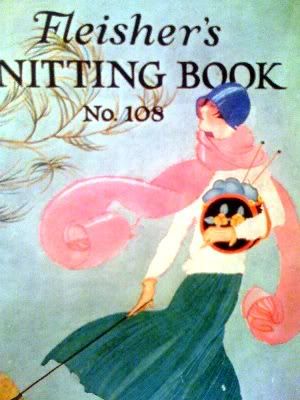
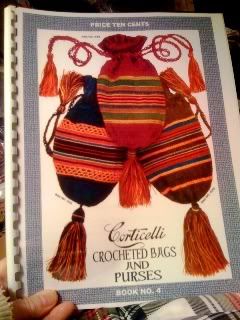
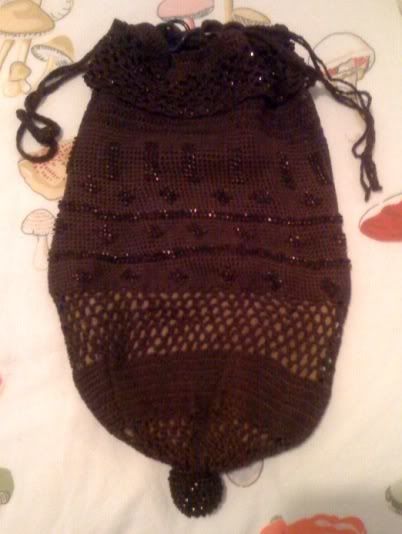
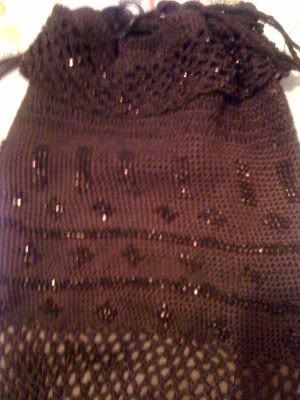
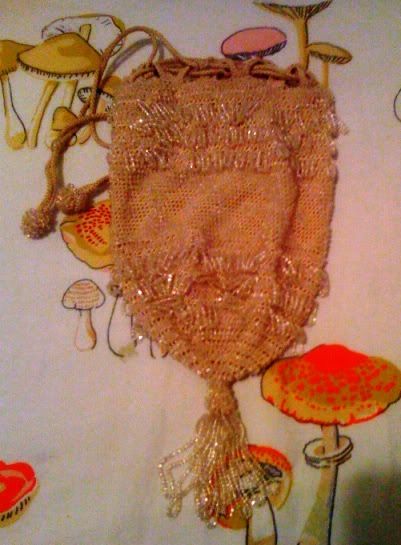
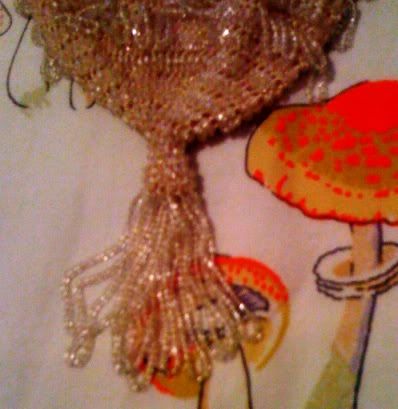
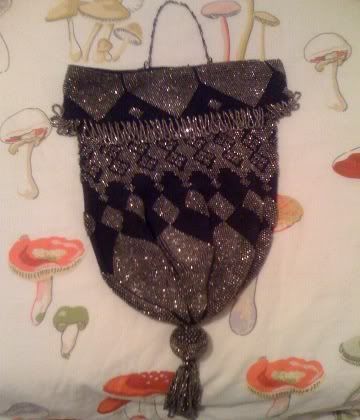
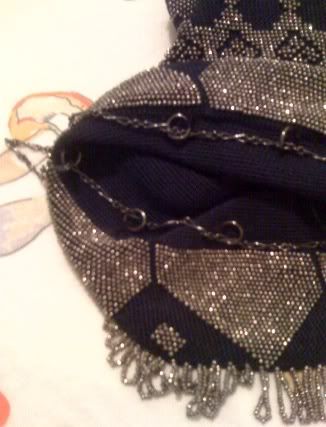
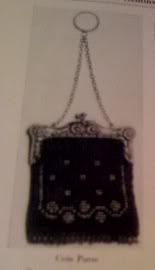
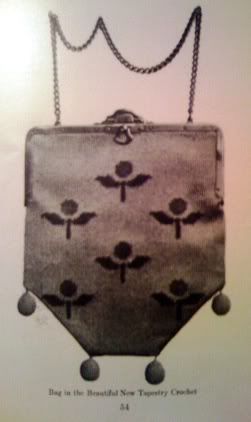
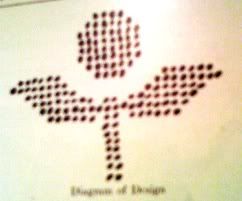
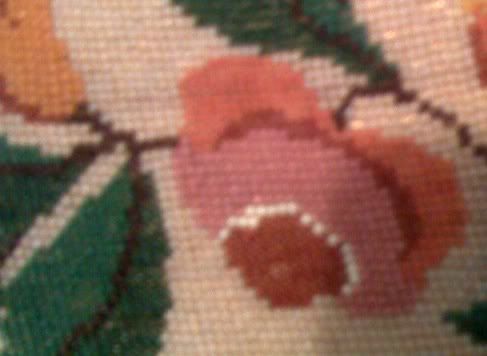
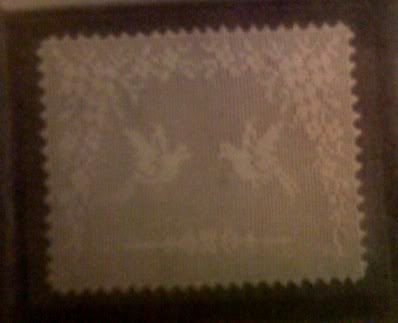
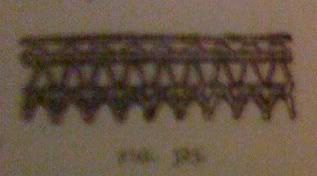
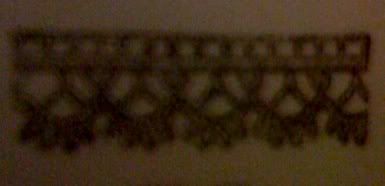
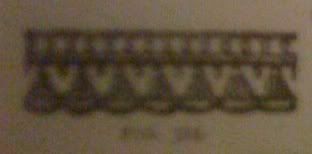
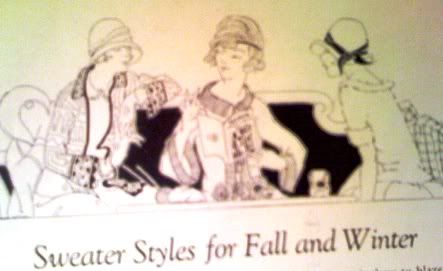
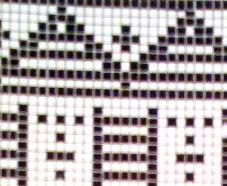
In my last post, I said I'd have a surprise for you at the end, but then I ran out time and this particular surprise takes a lot of time to type out! I had been planning to pour through my old pattern books and find one of the beaded bag patterns for you but then, as I looked at book after book, I found this in a pattern for a stylish sweater:

Photobucket

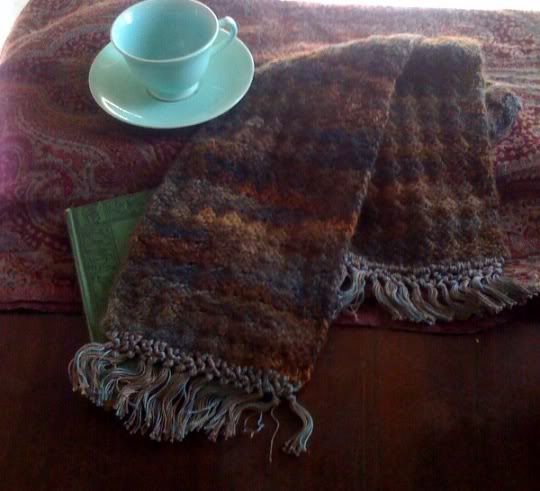
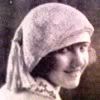
and it reminded me so much of this in style:

Photobucket

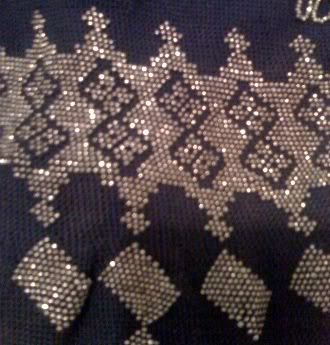
I took a closer look and both the sweater design and the bag were made within just a couple years of each other so... yeah... these were inspired by the Art Deco era that started in Paris in the 1920's.

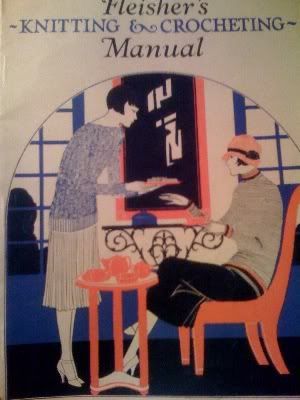
This pattern, The Spencyr Sweater, comes from 1923 Fleisher's Knitting and Crochet Manual, Number 106.

Photobucket

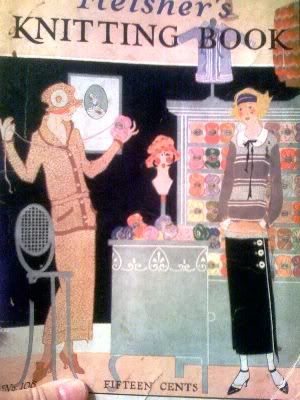
I have the complete series of these manuals, in the original, starting with 1890 and going through 1939, as well as several from the 1940's. It took me about 10 years to collect them! Each one is a complete gem. You can find many of these manuals, in reproduced form, through IvaRose.com. So here it is!

The Spencyr Sweater

~ S.B. and B.W. Fleisher, inc. Philadelphia.

Photobucket

Materials ~ Fleisher's Silverglow Yarn - 5 balls White, 5 balls Henna, 2 balls Black. Needles, 1 pair No. 5 (US). Gauge: 6 stitches and 6 rows = 1 inch square.
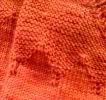
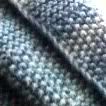
[Silverglow was a fingeringweight yarn on the thicker side, like Blue Moon Fiber Arts STR heavyweight]

No size for the finished sweater is given, but in other of their manuals they state that the patterns are sized 36 and to size up or down by changing the needle size and yarn weight.

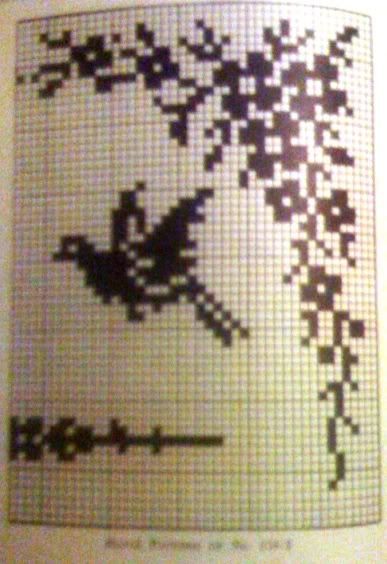
With black yarn cast on 96 inches, Work in stockinette stitch for 1 1/2 inches. Purl 1 row on the knit side to form a hem line and continue in stockinette for 5 rows. Join Henna and start pattern following chart no. 1.

Photobucket

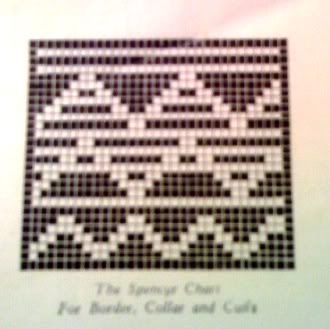
1st row: 1 st henna, *6 stitches black, 2 stitches henna*. repeat between *'s ending with 1 st henna.

Change to chart for body of sweater. On first row of all white increase to 99 stitches by increasing in the 2nd stitch from each end and also in the center of the row.

Photobucket

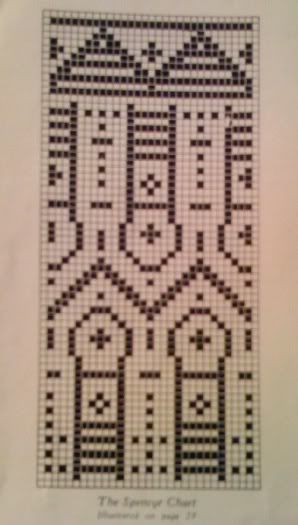
Follow chart for the 66 rows and repeat pattern from the 1st white row.

When back measures 21 inches from hem line (20 inches from 1st row of 1st pattern) bind off 5 stitches each side and decrease 1 stitch each side every 2nd row 3 times.

Work even for 5 1/2 inches. This should be the last row of 2nd full pattern. With white yarn work 31 stitches, place on a stitch holder, bind off 21 stitches. On remaining 31 stitches start front, reversing pattern from last row on back.

Work even for 1 inch, then increase at neck edge 1 stitch every other row 3 times and cast on 5 stitches.

Work even on both edges until armhole measures 5 1/2 inches from shoulder, then increase 1 stitch on armhole every 2nd row 3 times and cast on 5 stitches. Finish front same as back to border. Increase 1 stitch at underarm on 1sr row of border and follow chart.

With black, work 5 rows of stockinette, purl 1 row on the knit side and continue in stockinette for 1 1/2 inches. Bind off on wrong side. Make other side to correspond.

Sleeves:
With white pick up 71 stitches around armhole. Reverse pattern of sweater from 28th row of 2nd pattern. When work measures 10 inches increase 1 stitch each side every 2nd row 3 times. Reverse to 23rd row of pattern; this should measure 12 inches; then work border to match border on bottom. Work other sleeve to correspond. Sew up seams and hem bottom.

Band on Front:
With black pick up all the stitches from neck to bottom of sweater. Work stockinette stitch for 3 rows, purl 1 row on knit side, and continue in stockinette for 1 inch. Bind off on wrong side. Make other fromnt band to correspond. Turn both bands on knit line and hem.

Collar:
With black, holding wrong side of sweater toward you, pick up 70 stitches around neck. Work in stockinette for 1 inch. On knit row, knit 25, *knit 2 together, knit 7*, repeat between *'s once, knit 2 together, knit 25. Purl 1 row. Next knit row knit 24, knit 2 tog, knit 6, knit 3 tog, knit 6, knit 2 tog, knit 24.

Join henna. *knit 5, increase 1 stitch in 6th stitch* repeat between *'s twice, knit 27, *increase in next stitch, knit 5* repeat between *'s twice. Work 1 row black as follows: purl 2, increase in next stitch, purl 31, increase in next stitch, purl 31, increase in 3rd stitch from end, purl 2. Join henna. Beginning with 1st row of border chart work 7 rows. After last row of henna, with black work 3 rows of stocinette, purl 1 row on the right side for hem line and 1 1/2 inches of stockinette as before. Bind off on wrong side.

On front edges of collar, holding right side toward you, pick up and knit 16 stitches. Work in stockinette for 3 rows, decreasing at neck end every row. Work 1 purl row on knit side, and stockinette for 1 inch. Bind off on wrong side. Sew hem on collar and hems on edge over the deep hem.

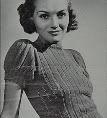
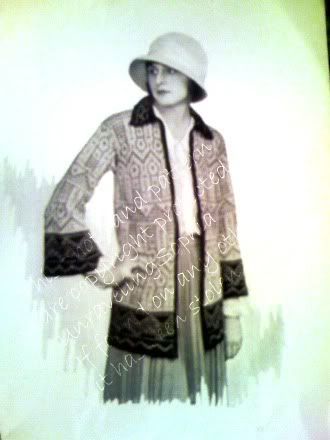
One last note,,,, doesn't the model in the sweater look so like Edith Granville from Downton Abbey?! And this is just the type of sweater that she would wear.

Sunday, February 26, 2012

It's in the bag...

Photobucket

Good morning! I hope you have a nice cup of tea, because this looks to be a long and picture-laden post! I'm going to show you my small collection of 1800's and early 1900's beaded bags, show you some of my vintage pattern books with their bag pictures and patterns, and - if my typing fingers hold out - a nice surprise at the end.

I've always been fascinated by those intricately beaded designs on little bags that were popular and useful items for over 100 years. I've seen them in my early 1800's knitting and crochet manuals right up through the early 1900's. Even in the 30's and 40's there were simpler versions of these bags in pattern magazines but their popularity was waning.

These covers from my 1920's Fleisher's manuals show the types of bags still used then, but less as chatelaines and more as project-bags:

Photobucket

Photobucket

Photobucket

Corticelli was another company that produced silk knitting and crochet threads and created pattern books to go with them. This reproduction Corticelli booklet from Iva Rose was originally printed in 1917 and is full of designs in the popular bright colours of that era as well as a few of the earlier bags in bead crochet and filet crochet.

Photobucket

My Heminway & Sons Silk-Craft manual also has a variety of these bags but from decades earlier. Heminway, established in 1849, also manufactured silk knitting and crochet thread - a laborious and exacting science in those years:

Photobucket

I have some original spools of this knitting silk in my collection, and from experimentation I've found that Perle Cotton size 5 might be substituted for some of these patterns, and comes in as wide a variety of colours as the early silks. You need something with a twist for durability (the original spools were called "Silk Twist") but thin enough for threading the tiny, tiny glass or steel beads.

My earliest bags are beautiful examples of the glass and steel bead crochet. Some are simpler geometric designs, like these from the 1800's using cotton twist and faceted bronze-coloured glass beads. I love the big beaded tassel on this small bag:

Photobucket

Photobucket

and this larger bag with its beaded, turned-down collar and celluloid rings that the drawstring loops through:

Photobucket

Photobucket

This cream silk twist bag has rows and rows of beaded swags and beaded diamonds and a tightly crocheted, beaded ball-and-tassel (incredibly, I found it at a charity shop with a $5 price tag in a box of purses. I did tell them it was mis-marked and paid them a fair price for it):

Photobucket

Photobucket

This magnificent example is in navy Silk Twist with steel/precious metal beads:

Photobucket

It's incredibly heavy - like carrying a brick of metal - and maybe that is the reason that there is no wear or flaw of any kind on this bag, even though it is at least 100 years old. An antique appraiser told me that the beads were sterling silver.

Photobucket

This bag also has rings, silver ones, for the drawstring...

Photobucket

But the drawstring is a chain - as delicate and intricate as a silver necklace - beautiful!

Photobucket

The Heminway Silk-Craft book has a pattern for a silver-bead style bag, not as elaborate in design, but a pretty example:

Photobucket

It also shows patterns for the cotton crochet bags, with beads used just for the poesy design:

Photobucket

Photobucket

But the King and Queen of my little collection are the silk "beaded picture" bags:

Photobucket

Photobucket

These bags use such tiny crochet stitches and the glass beads themselves are minuscule. There are at least 45 beads to one inch in this example, and hundreds in a round.

Photobucket

Photobucket

The Heminway booklet has one pattern for this type of bag. I imagine it would take a year to complete it - the pattern alone is 11 pages long! The Oak Leaf and Acorn bag:

Photobucket

It uses 2 and 1/2 spools of silk twist, 7 skeins (beads threaded on string) of black beads, 5 skeins of bright yellow beads, 5 skeins of dark yellow beads, and 2 skeins of red-brown beads. The directions that follow give exact instructions for threading every single tiny glass bead onto the silk twist in a colour configuration that will result in the design pictured, similar to hand-painting yarn before knitting it. Then a tiny crochet stitch is made in between each and every of those thousands of beads to create the fabric and the beaded design. Each bead has to be threaded in exactly the right sequence in order for the "picture" to materialize - Amazing!

Well, I do have a related pattern for you, but I've run out of time so that will have to wait for the next blog post. If you have ever tried beaded crochet, let me know - I'd love to see your projects!

Sunday, February 12, 2012

All Laced Up

Photobucket

Good morning! (a special good morning to my friend Nad across the ocean!) I hope you have a nice cup of tea this morning, or evening, wherever you are because this is going to be a long post about vintage booklets and lace patterns.

We were supposed to have a cosy but not too severe snow storm last night, with several inches of snow and so I thought it would be a good time to pull out the old knitting and crochet books and have a nice look-though with a cup of tea. I had such a fun time looking through them again and again, and picking out my favorites to show you!

However, the snow storm never developed - which is a good thing for me with my long driveway! We had these sunny skies instead:

Photobucket

I should have gone outdoors for more than a couple of dog-walks, but the indoors cose was so soul-restoring for all that!

The books I have to show you are old ones:

Photobucket

Dainty Work for Pleasure and Profit, 1901


Home Needlework Magazine, Feb-Mar 1912


Home Needlework Magazine, Aug 1915


The magazines themselves are works of art. I really love this aspect of vintage books and magazines. They strove to make the outsides as creative and inspiring as the insides. Rather than try to "hook" you with snappy catch-phrases and current watch-words, they highlighted one of the patterns that was contained inside, or they employed a current artist to draw a gorgeous scene. The August Home Needlework displays an enlarged version of one of the silk embroidery patterns in this issue, dragonflies, waterlilies, and cattails...

Photobucket

Even the ads are works of art, often illustrated with artist's ink drawings. The only place that has such beautiful ads these days is Ravelry (and sometimes Etsy)!

The Corticelli Kitten:

Photobucket

I love the art-nouveau border on this crochet cotton ad:

Photobucket

But my first reason for searching through old books to begin with was to find some pretty lace trims to crochet. I do love knitted lace, but there is something about those crochet picots and shells that just makes me happy!

Many people, when they think about old lace, think first of filet crochet - and it's true that filet is gorgeous and there are so many ways to adapt it. Take this beautiful tray mat, for instance:

Photobucket

Although it is designed for a small mat for serving, it would be so perfect to keep repeating the motif and make a kitchen window half curtain! All you would need to do is sew a series of those old bone rings across the top, or even crochet a series of loops - anything for the spring-rod to go through. It would be an even more beautiful baby blanket, crocheted in a soft chunky yarn and lined on the back with a deep blue flannel to look like the birds were flying through the sky!

Just in case anyone would like to try any of these ideas, this might help:

Photobucket

Many of the lace patterns in my old books were used to make panels that either were inserted between panels of fine cotton lawn for petticoats, or were sewn together side by side for bed-covers. This is a good example:

Photobucket

and the edging to go around the border is one of my favorites:

Photobucket

It would be really pretty as the edge of a baby's bedsheet or on a pillowcase as a gift, wouldn't it?

This is a classic edging for cotton nightgowns and pillowcases, too:

Photobucket

And I particularly love this one because it reminds me of seashells from the beach:

Photobucket

Some trims are complicated and combine several different types of crochet stitches back-and-forth to complete the entire design, like these, but they are well worth the results!

Photobucket

Photobucket

Photobucket

That last one, of off-center fans, I did try to replicate for you in one of Blue Moon Fiber Arts' silk yarns... but turned out so wonky that I pulled it all out by the end of the night. The directions leave a lot to the imagination and experience of the lace worker, who is supposed to use the drawing as a guide. I know I can master it, but it will take a little longer than I was willing to spend last night!

It's the little tiny trims that I love best. I really like changing up old patterns by using new colours and weights of yarns and wished that I could have summoned enough energy last night to sample these little lace patterns in some bright cotton threads to show you! How pretty these trims would be in Pond Scum Green (one of my favorite new colours), Tomato Red, or Butter Yellow! Here are some unfortunately blurry little photos of the tiny edging laces from the 1901 book:

Photobucket

Photobucket

Photobucket

I'll share one last one, with it's precious little bell flowers, with you here. It calls for crocheting into the picots of a "fancy braid" but you could achieve very similar results by starting with a crochet chain and picots. I hope that if you try it out, you'll post a comment here with a link to your results!

Edging No. 2, 1901

1st Row - 3 tr. into 1 picot of fancy braid, 1 ch., pass over 1 picot and repeat.
2nd Row - 1 dc under 1 ch., 5 ch; repeat.

Photobucket