Saturday, July 31, 2010

The Girls Own Paper

Keeping with my theme of old knitting and crochet books, I thought I'd post about the Girl's Own Paper. I have three of the Annual editions of this - which is a year's worth of the magazine or "paper", which was monthly - all bound beautifully together with illustrated end papers, gorgeous tipped-on coloured covers, and gilt on the spines. This particular one is from 1921 - 1922. I chose this one because it has the most beautiful cover and fly-leaf:

Photobucket

Photobucket

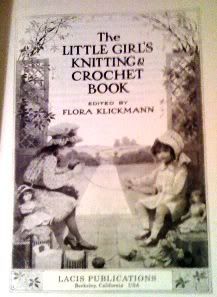
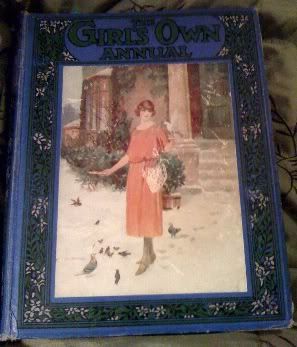
This book was edited by Flora Klickman, who lived in Brockweir, a little medieval village connected by ferry with Wales across the rive Wye and near Tintern Abbey. She became the editor of The Girl's Own Paper upon the death of the previous editor. She was already a published editor of numerous books of crochet and craft and even had established herself as someone who was dedicated to conserving the patterns and styles of craft from earlier centuries. There are scholars who believe that The Girl's Own Paper, published by the Religious Tract Society, had an unstated purpose of molding the characters of young women back into the less emancipated behaviours and expectations of the 1800's. It did have articles of a highly moral nature - persuasive articles - about how girls and women could contribute to society through moral and demure behaviour, especially during the war years. There were overt articles like "The Discipline of the Affections" and "The Shining Way" which exhorted girls to not become worldly and told them that living in the city (London) would make them sad and weary as well as worldly. The long serialized stories always rewarded the young girl who had behaved well, while the girl who "lost her way amongst the temptations of the big city" received her just reward - an illegitimate child, poverty, estrangement from family, or worse. Here is a "heartening song" published in this edition:

Be strong! Don't let the foes you meet
Laugh at the faltering of your feet.
Be strong!

Be kind! Don't judge that other soul
Who seems to miss some higher goal.
We cannot tell what hindrance lay
Within his road of workaday!

God knows where life roads twist and wind;
God knows what care-thongs grip and bind.
Be strong - and kind!

The phrase "care-thongs grip and bind" certainly has a different meaning these days! ;) That made me laugh out loud!

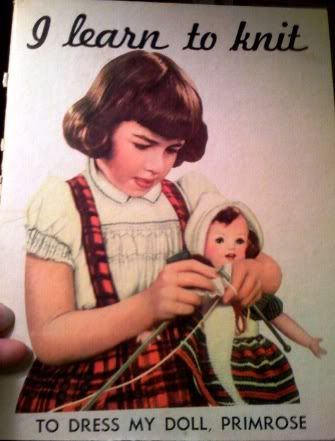
But my favorite parts of the Girls Own Annuals are the needlework articles - this was something that Flora Klickman excelled at and she published many little books devoted solely to these patterns separate from the Girls Own Paper. Here are some examples from this 1921 - 1922 Annual collection.

In the early part of the century many women made their own unders. While this was mainly a sewing task, there are a few examples of knitted and crocheted unders and combinations (one piece underwear with connected camisole and tap pants - considered a French style). Most of the sewn examples showed crocheted or knitted lace inserts and edgings. The "summer underthings" were often made from silk or batiste with embroidery.

Photobucket

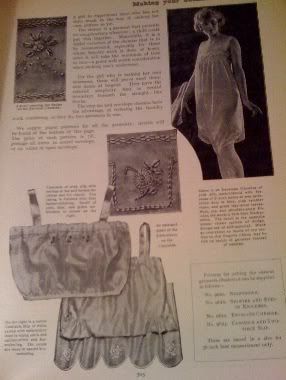
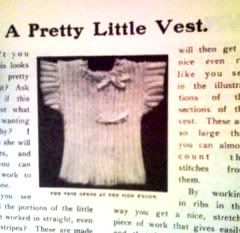
"Camisoles - the sort one likes - are always expensive to buy, and yet, given a little time and patience, one can make some delightful camisoles at little cost. An Envelope Combination made in wool is a decided novelty, and the one described... is as pretty as it is comfortable. It is knitted in four-ply Vest Wool, and is so shaped as to have no bulkiness at the waist, and yet the lower portion hangs full. You will certainly want to make this when you have seen it."

A "lower portion that hangs full" was as important 100 years ago as it is today!

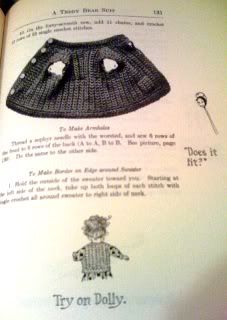
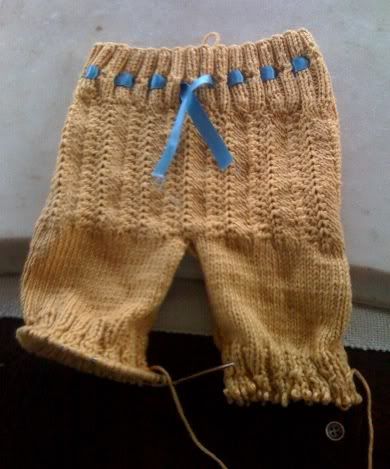
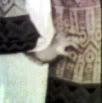
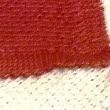
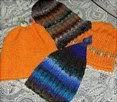
There are many pattern for children and babies, but not all are included in the book pages - some require you to send in a few cents to cover postage of the pattern or the knitting and crochet directions. Many of the patterns have simple lines. This little toddler dress is one:

Photobucket

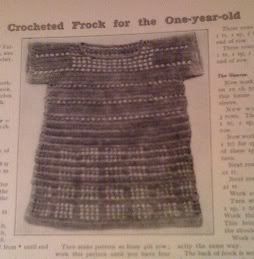
It is a fairly simple rectangle made on a foundation of 110 chains with single and double crochet and crocheted flat from the bottom up, so that the sleeves can be shaped by casting on 10 chains and the little scooped neck is created by turning and making the top rows of each sleeve separately.

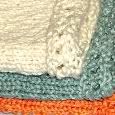
While the silhouettes of childrens' clothes were simple shapes, they often had beautiful embellishments to brighten them up - applique, embroidery, or knitted and crocheted lace inserts. There are several pages of filet crochet inserts that could be used for childrens' linens, clothing, or underwear:

Photobucket

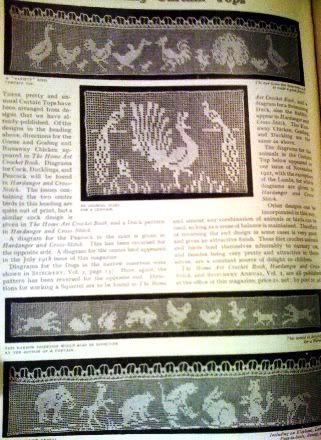
Flora Klickman often promoted her own books in the pages of the Girls Own Paper and these filet designs are from her publication "The Home Art Crochet Book". But the photos were large enough that an experienced crocheter could make the article just by counting stitches in the picture, as is true of the child's little dress above.

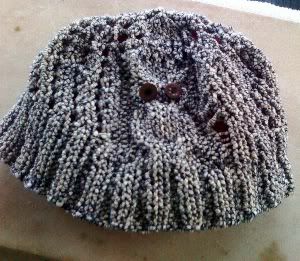
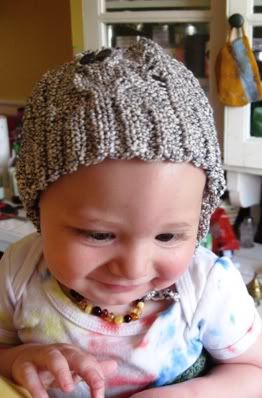
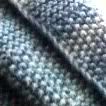
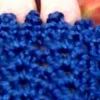
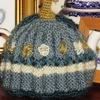
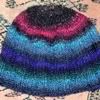
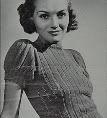
I love old hat patterns - some of them so outre that they couldn't be worn today...

Photobucket

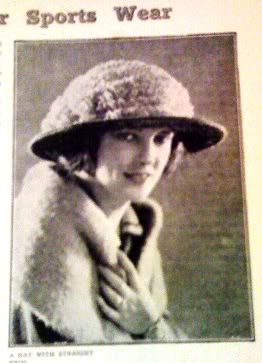
but some are perfect for my New England winters:

Photobucket

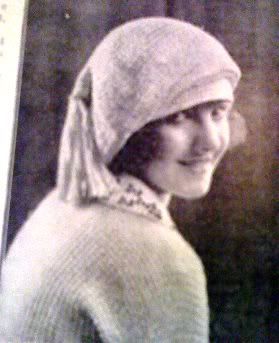
This is called A Becoming Tam o'-Shanter and I'll give the directions here, since it is out of copyright and in any case requires some translation from the obscure antique pattern-writing style which was vague at best.

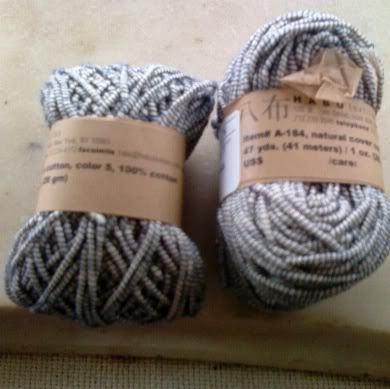
For this pretty tam you will need two 1/4 lb. balls of "Esplen-d'or" cable yarn (this is an Aran weight) and a coarse steel crochet hook (about an F, depending on your yarn).

Chain 4 and join with a slip stitch into a ring.

1st round: Ch 3, 15 tr (remember that this was published in England so a treble crochet is a US double crochet) into ring, join to first tr.

2nd round: Ch 3, taking up back loop only (in each round), work 2 tr in each of 15 tr, join.

3rd round: Ch 3, tr into back loop of first tr (same st with sl st), 2 tr in next, tr in third st, 2 tr in next, continue around and join (45 tr).

4th round: Ch 3 *tr in each of 2 st, 2 tr in next, repeat around from * (60 tr), join.

5th round: Ch 3, *tr in each of 3 st, 2 tr in next, repeat from * around (75 tr), join.

Continue to increase 15 st in each round until 14 rounds with 12 st between increasings are made.

15th round: Ch 3, *tr in each of 12 st, thread over, draw a loop through next st, over, draw through 2 loops, keeping 2 st on hook, thread over, draw a loop through next st, (over, draw through 2 loops) 3 times, repeat from * around, join. Decrease 15 st this way in each of seven following rounds, then make four rounds without decreasing, and finish off.

The Tassel

Wind yarn 70 times over a 7-in. piece of cardboard. Cut along one edge and tie strands in centre with two 20-in. lengths of yarn. With these four ends make a ch about 2 in. long.

The Cover for Tassel

Ch 4 and join into ring, ch 3, 14 tr in ring, join, (ch 3, tr in back loop of each st, join) 3 times. Finish with a row of picots: dc (the US single crochet) in first st, *ch 4, dc in top of dc just made, dc in each of 2 st, repeat from * around and join.

Draw ch on top of tassel through the ring of cover and sew to centre of tam.

Cut and fold a bias strip of georgette (silk ribbon) about 2 in wide. cast off last row of tam with this fold, then make a band of silk which will fit your head size and sew to the last four rows inside tam. Sew in lining of self-coloured silk.

This last part might need some translation. In other words, you are going to fold up the last four rows of crochet and, as you bind off, crochet them to the inside of the tam. Then you will take your bias length of silk ribbon (bias so that it stretches slightly) and sew it to the inside of this folded under brim, so that the silk is against your forehead when you wear the tam. I like this idea, but I think I might do it without the double brim, which I think might feel too thick for me.

Fini!

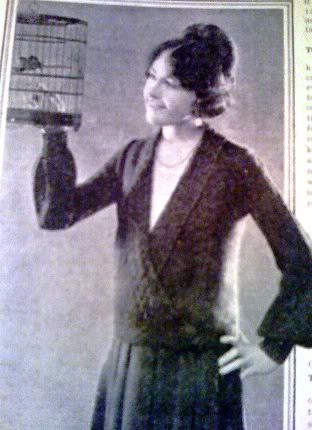
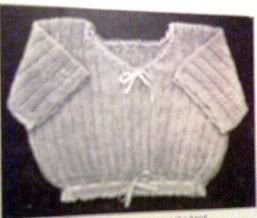
Other enticing patterns in this book are sweaters, called "Knitted Blouses". Full patterns are given for these and they are charming, and - again, because they are styled with simple shapes sewn together - very easy to make.

Photobucket

Photobucket

Another aspect of the Girls Own Annual that I love is the numerous articles on cooking such as "The Bachelor Girl's Supper" and "French Sitting-room Sweets". The full title of this last one is "French Sitting-room Sweets That can be Made with A Spirit Lamp". In other words, you don't even need a kitchen or a stove, but only a kerosene lamp. This allowed the young woman working in "the city" and living in a one-room studio apartment or who was boarding in one room in another person's house to make candies for gift-giving or selling at Holiday fairs - a great way to save and make a few extra pennies.

Photobucket

Here are a couple of the recipes that I have tried - only one requires the "spirit lamp". They were a great favorite at Christmas time with my friends!

Truffettes au Cafe:

1/2 lb best butter
1/2 lb best cocoa or finely grated chocolate (and some extra for coating)
3/4 lb plus 2 oz icing sugar (what we call Confectioner's Sugar)
1 tablespn coffee essence (I used instant coffee for this, which I think was the original meaning of "coffee essence" - 1 Tbl of liquid coffee flavouring would be too strong)

Beat the butter and sugar to a cream. Stir in the chocolate and coffee essence. Let the mixture stand till it has stiffened a little, so that you may handle it easily. Then form it into neat little balls the size of walnuts, and roll them in chocolate
which has been grated on a large grater, so that it is in small grains rather than powder (I've also used powdered chocolate for this and it was fine).

Arrange the finished trufflettes on dishes, and leave them till next day before putting them into frills and packing them in boxes.

They are Quite delicious - soft, rich, melting in the mouth. But they do not keep long. They are best when eaten within three days in summer, and a week in winter.

Rochers aux Amandes Grilles:

These are those rough lumpy chocolates with little bits of almonds in them, which you will find in all nice boxes of mixed sweets.

Blanch 1/2 lb almonds in boiling water, and skin them. (I bought almonds already peeled but I believe that you can take whole almonds and put them in a wire colander, and dip them into boiling water for a minute, so that the skins soften and are easy to peel off). Put them on the lid of your little lamp, and shake the lid over the heat till the almonds are nicely browned. Then chop them roughly, and add them to the truffette mixture (you can omit the coffee so that these have a different flavour).

Don't roll this in grated chocolate, but take up small lumps on two forks, roughening the surface as much as you can. Set the lumps on plates to dry.

~~~~~~~~~~~~~~~~~~~~~~~~~~~~~~~~

There you have it - a nice walk through a 1920's book for young women. Inspiring, yes? I think so!

Saturday, July 24, 2010

A Dose of Vintage

I thought you might like a little dose of Vintage this morning. A dose of vintage can lift your blues, kick-start your inspiration, and generally make you feel good. It works for me! But I admit I'm a little odd - I'm the person that has a chocolate-bacon bar for breakfast and likes wearing an old cotton granny-slip for a nightgown! But maybe you have your own reasons for liking the vintage flash, so here it goes:

A couple of years ago, I was fortunate enough to find an old children's knitting book, called I Learn to Knit to Dress My Doll Primrose.

Photobucket

It has an inscription on the inside, Christmas 1950, for Diane, with Love from GeeGee. So that pretty much gives me the publication time frame. A friend on Ravelry told me that this is the US publication of a French book of the same name, published in 1947. The story in the book is very 40's with carrier pigeons bringing news and propeller airplanes.

This children's book tells the tale of how the doll Primrose came to be found in the garden of a little girl, The little girl has just learned to knit, and so she makes a wardrobe for her new doll, and in the process gives simple directions - with lots of pictures - of the knitting process.

Photobucket

Photobucket

I love children's knitting books and have a couple of others (we have an antique book fair in my town every year - I missed it this year, but have gone often in the past) but they are scattered around the house in different places... Oh, okay. I'll go find them!

Here are the Mary Frances Sewing Book (Adventures Among the Thimble People) and the Mary Frances Knitting and Crochet Book (Adventures Among the Knitting People), published in 1913 and in 1918. The sewing book still has all the patterns, including one for a doll's wedding dress

Photobucket

Like the 1940's one above, these books provide simple instructions through a fantasy adventure story format and then offer practice with small simple projects that result in pretty instant gratification to keep the kids interested. These projects are described in these old books as "small projects that will not tire her."

Photobucket

Photobucket

Another Book I have is a reprint of Flora Klickman's 1910 Little Girl's Knitting & Crocheting Book by the LACIS company. Flora Klickman was an incredibly prolific crochet and knit designer and collector and chronicler of designs. She edited many little books of patterns, as well as the Girls Own Paper, which was a magazine for girls and young women meant to fill in the gap left by the popular Boy's Own Magazine. I have one or two of her Home Arts Series crochet books and a few of the Girl's Own Paper in their Annual Edition - which is a bound book of a year's worth of the magazines, with all the articles and colour illustrations. But back to the Little Girl's Knitting & Crocheting Book:

Photobucket

This book has very few instructions - just a couple of pages of simple stitches. Many of these patterns are doll clothes and accessories but the Little Girl's book has patterns for "Baby Sister" and "Baby Brother" too. This has the added advantage of teaching children to care for their younger siblings.

As well as doll outfits, it has slippers, hats, bags, knitted stays, filet crochet curtains, edgings for sheets, a petticoat, a fluffy blanket, a pretty vest (undershirt), and edgings for underclothes sized for a 4-year old and other patterns. This book seems to be geared to the preschool child who has already begun her lessons in needlework - lessons that in 1910, would continue through her childhood and girlhood if she were lucky enough to go to school or to have a governess or a mother with free time to teach her. (I also have some of those needlework instruction books that were used in early schools or by governesses to teach knitting and crocheting to children.) The Little Girl's book includes Filet Crochet in it's instructions and patterns, something I didn't find in the others. But that's not surprising because filet crochet was one of Flora Klickman's own special interests.

Here's a pretty vest pattern that fastens with knitted ties, on the side.

Photobucket

I love the ruffled, fancy cap sleeves on this little vest. I'd like one for myself!

Saturday, July 17, 2010

Nice Hat

From this:

Photobucket

To this:

Photobucket

To THIS!!!

Photobucket

Nice hat. Really nice baby.

Sunday, July 11, 2010

The Yarn Diving Pool

Photobucket

Yesterday was the day for our local Knit & Crochet Guild show and I immersed myself completely and enthusiastically like diving into a cool lake in midsummer! As in past years, it was held in our biggest city, in the largest hotel in the state. Even with the crowds, I only saw two or three friends there - people came from all over!

Photobucket

One of the fun things about this event is that so many people actually wear their knit and crochet projects to show them off and display their technical skill and colour sense! The beautiful shawl in gradient blues in the top photo was one of my favorites. But there were many others, including a rainbow-coloured crocheted shawl (looked like Kauni yarn) that went almost to the exhibitor's knees and another vendor's, who was selling Maggi's Knits and wearing her dramatic black and white felted shawl.

As usual, there was a huge vendor room, and I have to say - sheepishly I admit - I was in full stash acquisition mode. Yarns (and related knitting and crochet tools and accessories) were overflowing all around. It was hard to have any restraint at all! The colours and textures reminded me of an enormous, somewhat untidy flower garden.

Photobucket

I was very focused though, at least at first, because I had a mission: To see the fabulous Miss Babs, who I had previously known only over the internet, to re-visit the Habu booth (they know me and I like to spend a lot of time there), and to get some gifts: Christmas presents for my friend Nad in Germany - unusual things she might not find over there (and I have to say, I'm pretty sure I succeeded!!)- and a nice gift for a wonderful lady who is untangling a skein of silk for me in Chicago.

I started and ended at Miss Babs's booth (she gave me permission to snap her photo for my blog). She is just as nice in person as she seems online and she had a wonderful, attentive assistant with her who gave us gorgeous samples and answered any questions quickly and accurately. And just look at the incredible colours in the yarns behind Miss Babs!

Photobucket

I think I spent an hour looking through all her colours. I found that some of the colours look very different in person than they do online. It's so hard for the internets to capture the depth and subtle colour changes of these beautifully dyed yarns! There were so many that I wanted to bring home with me, including A Day at the Balloon Race, and Spring Tulip, and Oyster, and Coventry, and Spring Lettuce, and Chocolate Roses and A Day at the Onyx Cave, and so many more. There was especially one that was Lichen-coloured and I wanted it so much! Unfortunately, it was only in a big lace-weight skein that was very expensive and I had to pass it up, but I regret it...and it's not on her website. I discovered that the skeins that were named "A Day at..." were unique runs that were only dyed once and wouldn't be done again. I fell hard for so many!

Photobucket

From back to front, these are the coveted "Frog Belly," which I plan to use for an Annis shawl, "A Day at the Windlass Shipwreck", "A Day at Muir Woods", a sample of "Green Peppercorn", a sample of "Blackbird", and a sample of "Mums". And on top of all this loveliness, Miss Babs slipped a purple and silver stitch-marker into my bag!

Not all vendors are so pleasant. There were many places where I stood for a long time with carefully chosen skeins in my hands, waiting to pay, while the shop-keeper chatted up other prospective customers who were 'just looking' or gossiped with her booth-mate. Many times, another customer would come up on the left or the right and vendor would turn and take her or his sale as though I was invisible. In all these cases, I put the yarn back and walked away without regret. A wait in line is to be expected. But, equally, I expect to be waited on when my turn comes up. I have a choice of where I shop - a LOT of choice, as it turns out - and no longer have the patience to be treated as though my custom is dispensable. I vote with my purse these days, and I feel better about myself and my choices.

My next stop was the Habu booth.

Photobucket

These mini visits to Habu are among my favorite experiences at this Show over the years. The Habu lady who comes each time is so nice, friendly, knowledgeable and helpful - an expert, both in textile arts and in people-skills. She remembers me and chats with me about what she's making and what I'm making. She has an artist's colour sense and can immediately see the possibilities in unusual colour combinations. When I was looking for a silk/stainless that would be right with the fine charcoal ribbon silk I was holding, she picked up a blue/black shade that wasn't just perfect - it brought the knit from a nice scarf made with elegant yarns to an artistic project. And that's Habu's foundation - art textiles. She embodies this ethic. Can you tell I just relate to the whole of Habu?

The little booth is so full of so may different fibers, yarns, textiles, and possibilities! There were also copies of the new book Ori Ami Knits available, and the stack went down very swiftly!!

Photobucket

As you can see from the knitted and crocheted samples on the wall, Habu is a master of the subtle neutral tones...

Photobucket

That oak-y, lichen-y yellow-green is one of my favorites this year (the same colour I fell in love with at Miss Babs's booth - the one that got away!), especially mixed with grey or black. I really fell for the neutral palette in the Habu booth, and ended up with shades of grey, white, black, and olive tones in my basket. There was one fiber that looked just like pussy-willows to me and someone at Habu had made it into a beautiful scarf by pairing it with a funny textured cotton. I'll be making two of these this winter with the free pattern that was slipped into my bag.

Photobucket

I wanted to start on them immediately when I got home, but have tasked myself with finishing things, so have to do just a few last rows on my April Showers scarf and then I'll dive into the cool clear pool of these new knits!

Monday, July 5, 2010

Two Fails and a Win

The needle arts have been struggling around chez Sophia recently - in fact, they've been flopping like a fish on shore. It's not often that something you're completely familiar with flops up and smacks you in the mouth, but that's what my knits have been doing!

The first fail had to do with a skein of yarn that I've had in my mental knitting hope chest for a few years. This skein of Koigu PPPM has been sitting in the front and center of my glass-fronted bookcase, holding out the promise of some happy, bright summer anklets.

Photobucket

I think I originally got it as a single skein at the Patternworks summer sale. I was attracted by the cherry red mixed with lake blue and its small bits of green, orange and yellow shades for contrast. I had it pegged for the stranded Crusoe Socks, the original was made in this very yarn, and one skein has always worked for short socks for my narrow feet.

The pictures of the original pair of socks are so appealing!

My first fail was the size. The pattern calls for a cast on of 44 stitches. When I got past the heel, I tried them on - or attempted to! I couldn't pull them past my toes. My usual cast-on of 60 sts would have been better. I ripped out and restarted from the beginning. This time I made it to mid-foot - almost done with the first sock (they are cuff-down). I just couldn't stand it. The yarn, when knit up, revealed that it had LOTS of pink mid-tones hiding behind the red and blue. When knit, the colours blended in such a way that the fabric was mostly greyish-pink with flecks of the other colours here and there. I hate to say it, but it looked like clown barf. I ripped the socks back again and put the skein in the rejected bin.

Well, it's no fun rejecting a project - especially one you've pinned hopes on for so long! But, there is another. I've spent innumerable hours on a little pair of vintage-styled baby pants knit in soft Pima Cotton - Classic Elite's Premiere cotton and tencel. This is the same yarn I used for the vintage wrap undershirt and these pants where meant to make a set with that shirt. This pattern is from Vintage Baby Knits by Kristen Rengren (the pants are the third photo on the top row), though I modified them to be knit in the round, turned them from shorts to long pants, and changed the stitch pattern quite a bit - even adding cables to the legs. It has been a very slow knit - splitty yarn on very tiny size 2 needles - but I persevered because they were so very cute and would be so very useful for summer.

Photobucket

You know that back part, where you add short rows so that the bulkiness of baby diapers is contained? Look at the right side of these little trousers, and you will see that when I began the legs of these charming pants, I folded them with the back waist on the side. Fail!

My dilemma is whether to rip out completely (at this point the yarn is looking a bit exhausted) and start over, or whether to persevere and see if it really makes much difference to the fit. After all, these pants are likely to be shortly grass-and-sand stained from the park. Ah, well, I think these pants are already too small. I'll rip them out completely and re-make them into a pair of summer of shorts according to the original pattern.

I do finally have have a successful knit! I created a pattern for cotton summer cap for the little guy - something that will be cool in hot weather, but protect his sensitive noggin from sunstroke. This cap, my own design, was knit from Habu A-184, Natural Cover Cotton, colour 5: natural with a navy wrap.

Photobucket

What looks like a hole by the foot of the Owl cable is actually a spiral eyelet, folded under which made it look a little bigger. I hope soon to have a modeled photo.

This spiral eyelet pattern took a skein and a bit (each skein of this Habu yarn is 47 yards). It does have little ties that I tucked inside for the photo, because Frankie is now pulling his hats off as fast as they go on.

Now I am trying to resist any more experiments. I have a few project possibilities to start and a couple of long-term projects to finish up. And it's July, which means it's time to start knitting for the winter holiday gifts.