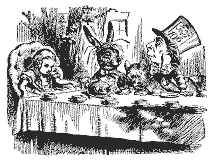
'...It's always six o'clock now.'
A bright idea came into Alice's head. `Is that the reason so many tea-things are put out here?' she asked.
`Yes, that's it,' said the Hatter with a sigh: `it's always tea-time, and we've no time to wash the things between whiles.'
`Then you keep moving round, I suppose?' said Alice.
`Exactly so,' said the Hatter: `as the things get used up.'
`But what happens when you come to the beginning again?' Alice ventured to ask.
I'll tell you what happens when you come to the beginning again....you just make another hat! Yes, I was very interested in making hats for Christmas presents this year. Hats are such gratifying projects. There is always enough yarn for them, and they come in infinite variety, and within this infinite variety there are infinite possibilities!
Before I began my hat party, I chose all the patterns that I would use: The Grace Lace Beret, from Loop Knits; Leaves, by Helen Bingham, StarStruck (I was looking for a pirate-y toque); and Urchin, by Ysolda.
Some of these I knit as presented and others I modified to suit my free spirit mad hatter nature... I'll take them one by one and describe each one with any modifications I made and the yarns I used...
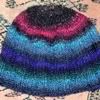
Urchin
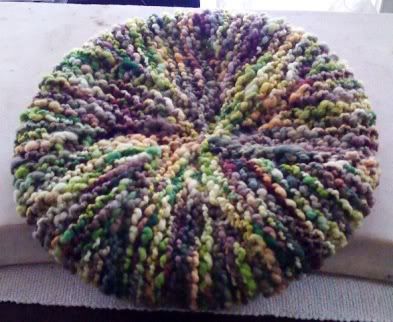
Urchin was the first one I made and was a very fun knit. It had to be done early, since it was a gift for my friend in Germany and had to travel a long way (as it was, it only arrived at its destination on New Year's Day!). I used a skein of Farmhouse Yarns Lumpy Bumpy - a handspun, handpainted yarn that has incredible colour combinations and a super soft feel. I love this yarn with a passion, but there are limits to what you can do with a 'thick-and-thin' spun yarn; it has areas as thin as thread and big areas of cloudy almost-unspun roving. Urchin is perfect for this, incorporating all thicknesses into its garter-stitch, sideways-knit construction.

I used the needle size called for (7 mm) - I used 10.5 single point needles by Bryspun (one of my favorite needles for single points). The pattern isn't hard, but many people get stuck where it says "knit row 8 more times". What it means is that you continue making a wrap & turn on each row - both the top of the hat and the rim - so that when you are finished you have 5 wraps Plus the first 3 sts (unwrapped) on the rim, as well as a larger number of wraps (plus the one unwrapped first st) at the crown. The number of wrapped stitches at the crown will depend on the size you are making. Note that this hat runs small - you can see this in the pictures on the patten of Ysolda wearing her hat. I have a (relatively) small head, but in order to get a size that would fit over my hair, I would need to make the large size - cast on 24 stitches.
I loved the Urchin that I made for Nad so much, that I'm currently making a second one for myself!
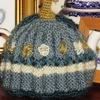
Leaves
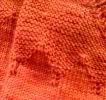
The Leaves hat pattern has to be the easiest, most logical, and quickest pattern with a complicated look that I've come across. It's designed for use with a Chunky or Super Bulky weight yarn - remember if you use a different weight, you'll have to modify the stitches or it will end up tiny! I used one skein of Nashua Handknits Creative Focus Chunky. This is a beautiful vibrant wool with a halo...

This pattern is knitted from the rim to the crown, so a stretchy cast on is needed. I used the long-tail cast on, and it was nicely stretchy. The pattern calls for size 11 and size 13 needles in 16" circulars - I used my Boye Needlemaster interchangeable set, the only interchangables I have that go up to size 13 without buying extras - and a set of size 13 DPNs for finishing the crown (I used the largest DPNs I had - I think they were 10s).
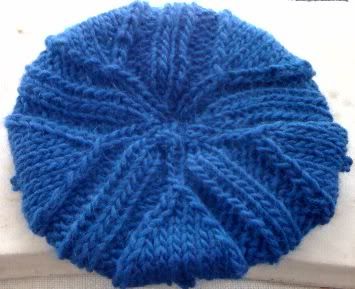
I didn't make any modifications at all...
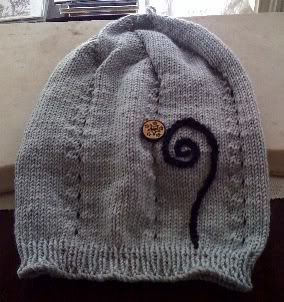
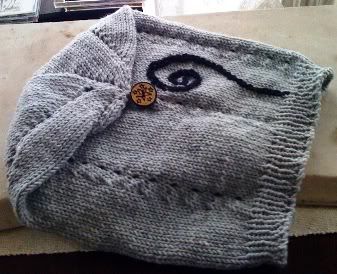
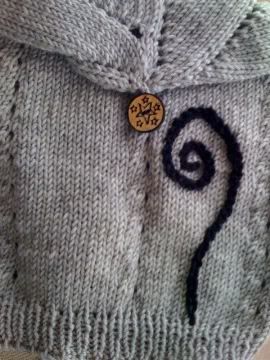
Monastic Leaves
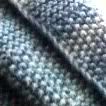
I loved making Leaves so much that I decided to try it again with some modifications I had in mind. I wanted to make a toque for a friend of mind who is an Orthodox monastic. It had to be black and I wanted it to have the vintage look of an old-fashioned night cap or even a crown... those hats that writers in the 1800s wore in the evening before the fire because houses were so drafty. I also had only two skeins of black Bazic wool, so I needed to make sure that I had enough for this hat; it needed to be top-down.
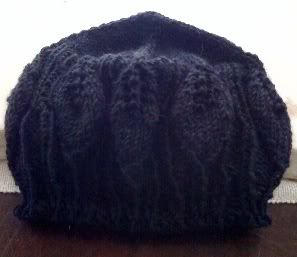
I started out using the top-down method from my own Noro One-skein Top Down hat - I find it very easy if I do say so myself! :) After continuing with the crown increases until it fit the top of the head, I started with the Leaves pattern, but of course since I was doing it top-down instead of rim-up, the leaves would be upside-down. I wanted this - the leaves looked like they were dripping down from the branch of a tree. Bazic is a slightly thinner yarn than the pattern called for, so in order to have a hat that actually fit on a head, I made 8 leaf repeats around... instead of the 5 of the original pattern. I also started making increases in between the leaves as I went down so that I would end up with the number of stitches that the original pattern started with - basically just doing the pattern backwards.
A top down hat requires a stretchy bind off. I used EZ's sewn bind off. To make the little point on the crown, I just threaded the cast on tail through each stitch and pulled it tight - the beginning increases did the rest!
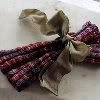
Star Gazer Pirate Toque - Starstruck
This pattern is from Kristine Grønningsæter's blog where she describes it as a "simple" pattern. Her directions don't give many details, but it is enough to create a nice floppy winter hat that can be modified in a variety of ways. I used Sublime yarns Organic DK wool - I happened to have two skeins that a friend had traded to me for a different colour to finish her sweater. I think the original pattern was knit with a thinner weight, because I came out with a huge hat. It was certainly floppy though! Since I had wanted the hat to look like those old pirate/ sailor hats (you see them in cartoons as red and white striped), the big floppiness suited my purpose. But if you want it look like the original, use a light-weight yarn, like light fingering. To insure this desired "flop" I turned the crown down and used the ending tail to crochet a loop for a starry button:
I also added some embroidery using a simple chain stitch with some leftover black Malabrigio worsted. I think it adds a jaunty touch.
The rim as written turned out to be too huge so I tinked it and redid it with a smaller needle size. It ended up really cute and perfect for the recipient, but wasn't a straightforward knit because the directions were so scanty....
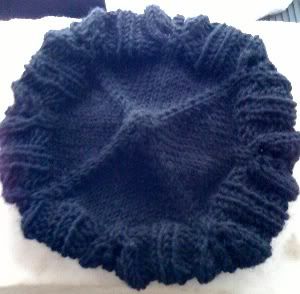
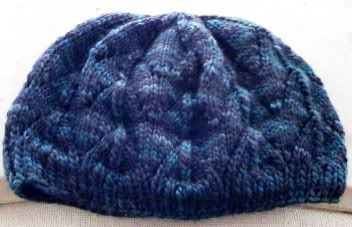
Grace Lace Beret
The last hat in my Mad Tea Party of Christmas hats was the Grace Lace Beret. I used this pattern, first, because my friend Tethys had made one for me using Louisa Harding's Grace silk and wool and I absolutely love it, and second, because it was for a friend who is allergic to wool so I needed a pattern that would work well in silk, which doesn't stretch much.
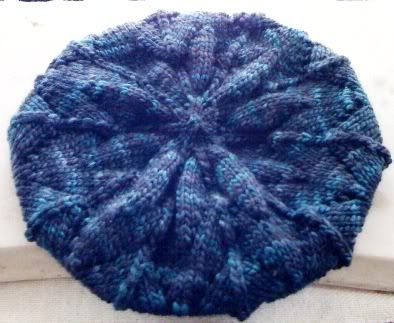
I used Blue Moon Fiber Arts Luscious Single Silk (LSS) in the deep and mysterious Haida colourway - one of the "Ravens" series. It is a black with unexpected flashes of iridescent blue. I probably should have used the Luscious Silk, which has a tighter spin, more like Grace silk, but I love the LSS and the colour was perfect for my friend, so I went with that.
The cast on gave me lots of trouble. I must have tried it 3 times. I can never do that crocheted provisional cast on - it baffles me. On top of this, your first row after cast on is an increase in every stitch! Someday I'll master it, but this was not the day. I ended up using a braided cast on - not quite as stretchy, but with this softer yarn it worked well.
The rest of the hat was knit as written, and looks super cute on. It uses size 9 needles in 16" circular and size 4 DPNs for the rim. . This pattern has a kind of gathered top - I prefer a smoother top for a beret, but there's no denying that it works for this design. It may not look great on it's own, but when it's on your head, it's perfect...
So that is almost the whole story of my Christmas hat knitting! There are still a couple out there that don't seem to have reached their recipients yet, so I'm trying not to reveal them. Lots of fun, and I found some wonderful patterns.
Now, if I could only get all the recipients together for a hat-wearing winter tea party!


1 comment:
Hi Sophia,
Thanks for posting your knitting projects! I am in the middle of the grace lace beret right now and it is so hard! I'm still more of a beginner and this is, by far, the most difficult thing I've ever knitted. I'm finally into the 1x1 ribbing (round 5 or 6) and I had a lot of problems with the cast on and first three rows as well...I must frogged back to the beginning like 10 times! Do you have any advice for the lace pattern after the ribbing? Was the rest of the pattern pretty straightforward?
Thanks!
-Anna
Post a Comment