Saturday, June 27, 2009

and now.... back to our regularly scheduled programming...

I suppose it is natural after a huge effort and event like the wedding to feel a bit of a let down when it's all over. Jule and her new husband are now on their honeymoon and I am back home on the other side of the country... I've been trying to pick up the projects and plans that I put aside to make the wedding dress but it's been hard.

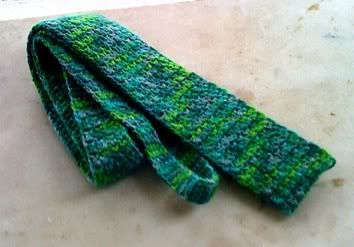
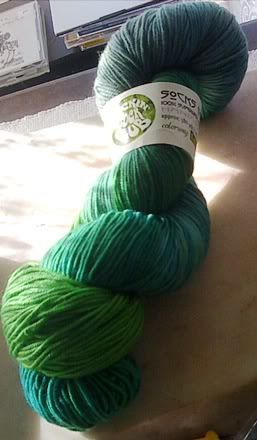
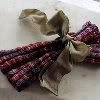
Here is a bit of eye candy:

Photobucket

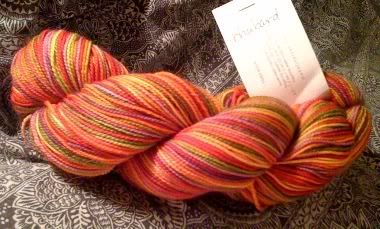
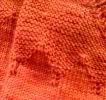
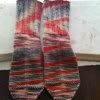
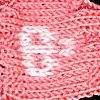
This is a skein of Rhubarb in MadelineTosh fingering merino that just arrived at my door. I had planned to pair it with another skein of the same in Oak (a kind of pond scum green) to make a fake isle shawl collar sweater. That will happen, just not for awhile. The Rhubarb skein is much more fluorescent orange that the one that was displayed when I ordered, but this is the way with hand-dyed yarns. I think it will still look fine with what I have in mind.

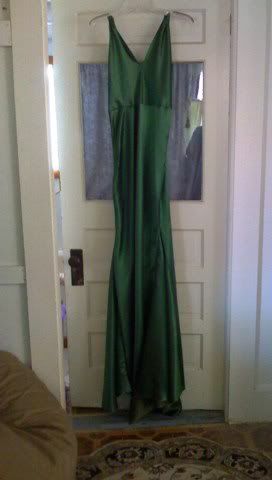
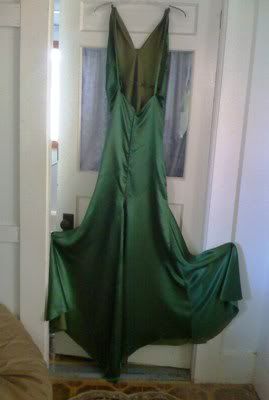
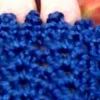
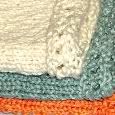
I'm in the middle of a lily-of-the-valley shawl made with Kraemer white lace-weight with sterling silver yarn. This was to be the wedding shawl, but of course couldn't be finished until the dress was finished and I was still altering the dress up until the morning of the wedding! Now that I am near the point of the shawl (it's a modified triangle - the points are rounded) it's going much faster!

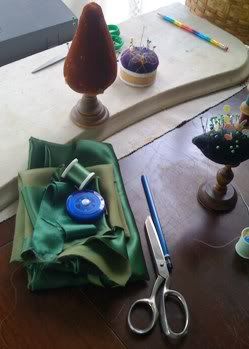
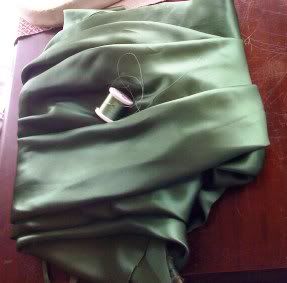
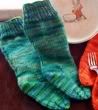
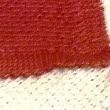
While I was in Portland, I got a small skein of jade green silk for wrist-gloves and the new Piecework magazine - the "Travel Issue" - has the perfect pattern for them. I want to start these soon, but I'm afraid if I double-book (cast on for a second project before I finish the first) I won't go back to the shawl. A complicated lace shawl - with nupps! - is a serious commitment. And I'm not a serious girl. So it takes a lot of push for me to take these longer projects to the very end.

I know I'll get my knitting mojo back shortly - all it takes is a pretty yarn to get me inspired and a nice dose of Ravelry - but for right now... I guess it's just time to breathe.

Wednesday, June 24, 2009

Wedding in the Glade

Photobucket

This glade in the Hoyt Arboretum was a beautiful, enchanted place. It was sheltered by three large, tall trees in a triangle and a fourth tree - an old oak with spreading branches that had holly circling up its massive trunk. The ground was covered with wild flowers, and rose bushes in bloom circled around... The air was full of birds singing...

Saturday, June 13, 2009

Wedding Dress part three - Finished!

It was with a sense of despair and the feeling that I would never complete this that I got up early and faced the front room as soon as it was light enough to see without the lamps. I had to make a decision about the back train and hadn't been able to get in touch with Jule yesterday to ask what she wanted.

When I went to bed last night, two decisions were rattling around like pinballs inside my brain: a big frothy train? A wide wrapping sash?

When I looked down at the dress spread out on the table, and laid out the folds of fabric that would cascade down beneath where the back sipper ends....it all came clear. I heard Michael Kors' voice on Project Runway saying "and what is that!? She looks like she's pooping fabric!" (he really did say this to a contestant once. Heidi said it first, but he said it most emphatically.).

I chose something sleeker, and much more flattering to the butt. Here is it pinned but not sewn or pressed:

Photobucket

The next task was to finish the straps and here I made the very first mistake that required unpicking the thread and re-doing.

Photobucket

You know how when you're knitting in the round and you do the first cast on and then "join, being careful not to twist"? and you check - and double check - to make sure that your join is not twisted? The same sort of thing happens when you are attaching shoulder straps. You have the front sewn in and you're slipping the edge of the back strap between the back edge and the narrow facing. You say to yourself "seam towards the shoulder. seam towards the shoulder." You double check and then sew it in and go over it three times - because there is a lot of stress on this point, since the dress hangs from the shoulders. And then you hold the dress up by the straps and you check that the strap seams are facing towards the shoulders and.........there it is. The dreaded twist. You can't exactly rip stitches out of silk. So you pick up an insanely thin silk needle and begin to un-pick the stitches one by one. Luckily on the re-do it looks fine. Love and care cover a multitude of careless sins (or inadvertent mistakes).

Hemming came next - all hand-rolled hems. I did get out my 1900s sewing machine that has a narrow rolled hem attachment, but when I experimented on a scrap of silk, the tight narrow hem was so stiff, like a cord, that it made what would be the hem edge stand out in a circle like a crinoline! So it was hand sewing for all the hems - the back edges, catching in the top of the zipper, the neckline edge, making a wide curve, and the yards and yards of skirt hem:

Photobucket

It took 6.5 hours solid of hemming just for the skirt alone. While I hemmed, I watched Willy Wonka and the Chocolate Factory (the old version), Willy Wonka and the Chocolate Factory (the Johnny Depp version), Robin Hood (the Uma Thurman version), and a few assorted British sit-coms. Good stuff.

As for the sash, I'm going to wait. I'll make the waist part tomorrow, but bring all the rest of the silk with me, in case it's needed:

Photobucket

Now I am really and truly finished. All that remains is the fitting and the subsequent shaping and hemming of the arm-curves. That part has to fit exactly, or else make use of lots of double-sided tape!

FRONT:

Photobucket

BACK (showing hem):

Photobucket

Tomorrow I pack it all up and then board a plane for next week-end's wedding. I'm so excited! Jule, I hope you like this and I'll see you soon!

Photobucket

Friday, June 12, 2009

Wedding Dress, part two

WARNING - This post is VERY Picture-heavy! If you have a slow connection, it might take forever to load...

Day two on the sewing front... yesterday evening I stopped after basting the pieces together. I found out this morning that the bias cut had caused one of the godets to hang lower than the other. There was nothing wrong with the cut, I just needed to take the basting out, let both pieces hang naturally and baste them together again. They fit perfectly after that:

Photobucket

Now it was finally time to sew!

Photobucket

See the pretty silk thread winding on it's bobbin? I like to use silk thread with silk, although some people say to use cotton so the seams are sturdy. I like the lightness of the silk thread, especially with a bias gown.

Photobucket

Sometimes I just don't have the right tool for the job and have to improvise. Here I am using the spool-holder of a weaving shuttle to turn the tiny thin straps right side out:

Photobucket

Do you like mysteries? What's This????

Photobucket

Surprise! It's a zipper! An invisible zipper!

Photobucket

The godets are sewn in - what a lot of skirt!

Photobucket

Back downstairs now, to place and baste the bodice to the skirt and back upstairs to sew it:

Photobucket

Then...the really scary part!

Here I am with the center cut of the bodice. This is what will form that lovely wide shoulder-bone-to-shoulder-bone V neckline... I placed my handmade tissue pattern, with the cut marked, back over the bodice and basted the cut line with ling running stitches. Then, I gently pulled the tissue away, leaving the stitches in place on the silk...

Photobucket

Photobucket

(cue the theme music from JAWS)... here come the scissors! Oh noes!

Photobucket

The cut is made - 6.5 inched from the hollow of the throat. There's no turning back now!

Photobucket

The next step was to place the straps against the bodice to drape it and figure out how it would actually come together. It's starting to look more like a real gown now...

All of the hems must be hand rolled - the neckline, the arm and back edges, and the wide, wide, wide, wide hem. I couldn't get back far enough to take a picture of the entire hem at once, because with the front, the two back sides, the two godets, and the back train it is about six yards around...

Photobucket

Photobucket

I think I will hem this on the plane! (it's a long flight)

Tomorrow: finishing the bodice and neckline, designing and setting the train godet, and starting the drapey waist sash...

Thursday, June 11, 2009

Wedding Dress, part one

It began with an idea... a vision of a 1930's silk, bias cut gown....

Photobucket

It took 2 hours on this dark, rainy Thursday morning to design and draft the bodice pattern...

Photobucket

and then to place and cut it on the bias...

Photobucket

But the gown front was even more complicated and required a newly drawn pattern of it's own. Also on the bias, it needed extra wide seams and an extra inch of ease on either side to make up for the bias downward drape...it has a slightly raised curved top edge, a shaped waist and a wide flared skirt.

Photobucket

The back was next... and it was mid afternoon. I used the back piece of an actual 1930's gown for this, but with adaptations: an extra 10 inches of length, including a curved back train, and more flare in the skirt, and a seam up the back.

Photobucket

Photobucket

The side godets needed lengthening too. By this time Jule had called and since a friend was over helping her move, she was able to get to some accurate full length measurements (sigh of relief...).

Photobucket

Godets are cut, with an extra wide circular hem...

Photobucket

It's important with bias cut silk, to press the material right after cutting. This helps prevent further stretching of the bias and it 'sets' the drape somewhat. The silk pressed beautifully and slipped through my fingers like jade tinted water.

Photobucket

Finally, I had it all together: the bodice, the bias front, the two side backs, the two side godets, the thin shoulder straps, and a set aside back godet with train...

My final step today from four until the sun went down at 8 pm and all light faded from the bow window in the front room, was to baste all the pieces together by hand to make sure it all eased in together just right!

Photobucket

I was tired! Tomorrow I sew. Wish me luck!

Last night I finished blocking the Lucky Guy tie. Blocking really gave it a nice polished look and drape. I love it!

Photobucket

Photobucket

I love the bright green zig zag down the front. I can't decide if it looks like argyle or a snake!

Photobucket

Thursday, June 4, 2009

Lucky Guy

Photobucket Photobucket

Some time ago (a little over a year) I got this skein of yarn through the Blue Moon Fiber Arts Sock Club. It's called "LUCKY" and is a beautiful melange of shamrock, jade, bottle, leaf, and Kelly greens. I'm sorry to admit that I didn't appreciate it when I first received it in the mail, and Tina, the wonderful dyer and colour artist from BMFA, offered to exchange it for a skein that was a little less "lucky". But I couldn't part with it, and now I'm glad!

Just this week, it's been decided that the wedding will be a green wedding. Green is lucky in so many ways, and is a favourite colour for all concerned. So, I'm using this skein to make another wedding tie - a Lucky Tie for a Lucky Guy...

Photobucket

The pattern is from a 1921 Bear Brand Glossilla booklet. Glossilla was a substitute for silk. I'm using fingering weight wool and it's coming out beautifully. The wedding dress is from a 1930's pattern (yes, I'm making the wedding dress, too!) so having Mr. Lucky in a 1920's tie would be great! I don't know if he'll wear it, but I want to make it anyway....

Photobucket

I am having to re-write the pattern for this, but I am using the stitch indicated. I'll give more details when it's all finished Right now, so much is happening at once - including organizing a honeymoon in Buenos Aires!